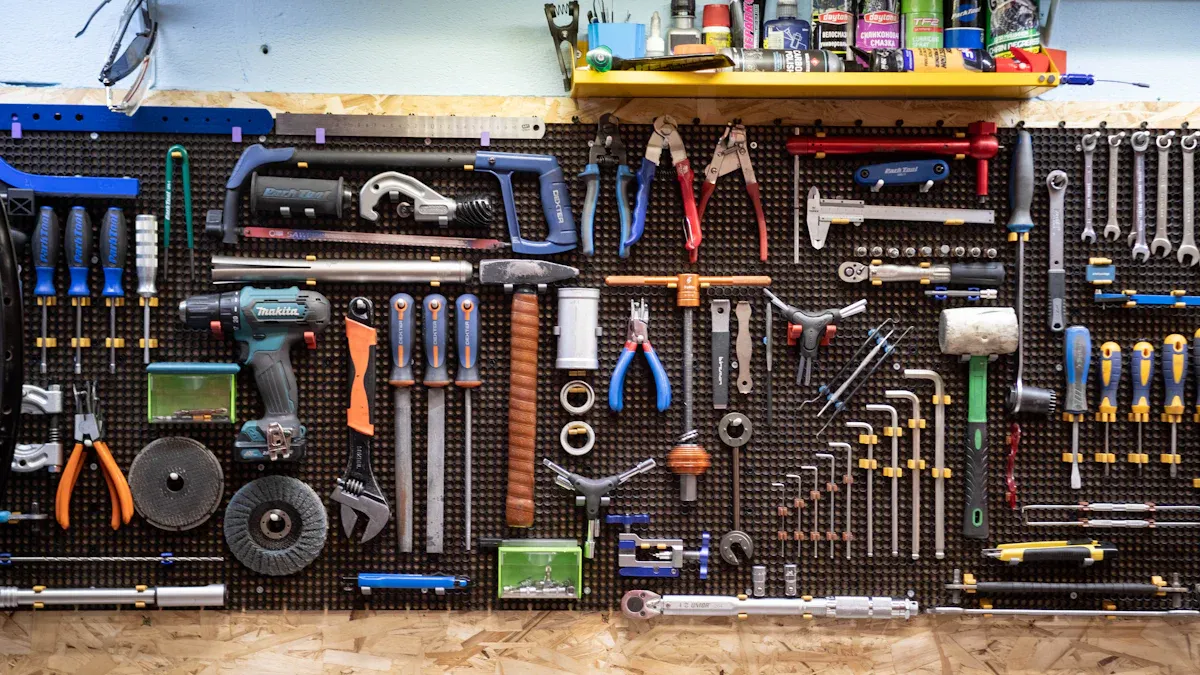
Every new homeowner should have a set of faucet repair tools ready to go. Grab an adjustable wrench, basin wrench, flathead and Phillips screwdrivers, slip-joint pliers, plumber’s tape, and a faucet rebuild kit. These tools help you handle everything from a leaky faucet to full replacements. Doing your own diy repairs can save you a lot of money since hiring a plumber often costs over $130 per hour, while most fixes only need supplies under $50. With a few basics and a clear step-by-step guide, you can turn off the water and tackle most issues safely.
Essential Faucet Repair Tools
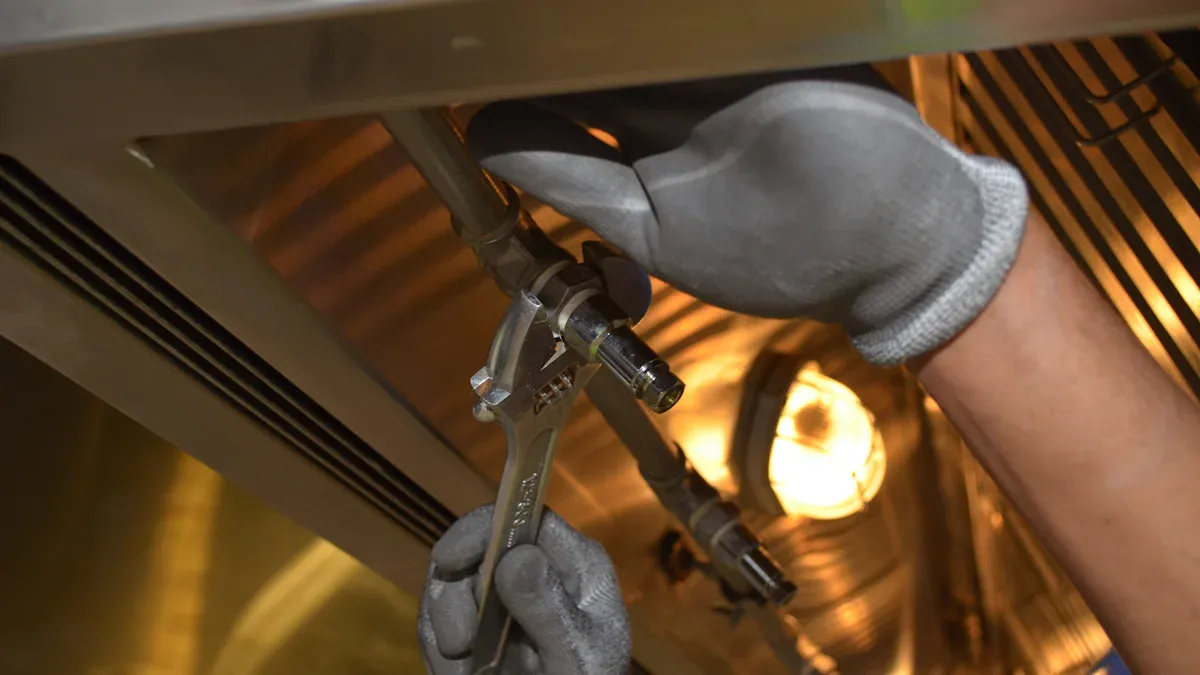
Adjustable Wrench
You’ll find an adjustable wrench at the top of almost every list of faucet repair tools. This tool stands out because you can change the jaw width to fit different nuts and bolts. When you work on a faucet, you often deal with fasteners of all sizes. The adjustable wrench gives you a solid grip, so you can loosen or tighten nuts without slipping. It’s especially handy when you need to remove old faucet parts or install new ones. While it’s versatile, you might notice that it doesn’t always fit into tight spaces under the sink. That’s where other specialty tools come in. Still, for most basic faucet repairs, you’ll reach for your adjustable wrench first.
Tip: Keep your adjustable wrench clean and dry. This helps prevent rust and keeps the jaws moving smoothly.
Basin Wrench
If you’ve ever tried to reach the nuts behind a kitchen sink, you know how tough it can be. The basin wrench is made for this exact job. It has a long, narrow shaft and a swiveling jaw that grabs onto nuts in those hard-to-reach spots. The T-shaped handle lets you twist with one hand, even when you’re working in a cramped space. Some models even have telescoping handles for extra reach. The jaw can turn at a 90-degree angle, making it easy to clamp onto mounting nuts beneath the faucet. You’ll find the basin wrench especially useful when you need to remove or install a faucet in your kitchen or bathroom. Its design helps you avoid scraped knuckles and lots of frustration.
Long handle reaches under sinks and behind fixtures.
Swiveling, spring-loaded jaw grips nuts securely.
Telescoping models extend your reach for deep sinks.
Ergonomic handle gives you better control and less strain.
Plumbing experts always recommend a basin wrench for new homeowners. It’s a must-have for any faucet repair job that involves tight spaces.
Flathead and Phillips Screwdrivers
You’ll use flathead and Phillips screwdrivers in almost every faucet repair. These tools help you remove handles, unscrew packing nuts, and take off decorative caps. When you’re fixing a leaky faucet, you often need to get inside to replace washers, O-rings, or seals. Both types of screwdrivers work on different screws, so it’s smart to keep both in your toolkit. Sometimes, you’ll run into a stubborn or stripped screw. In those cases, a flathead screwdriver can help you pry it loose or even hammer it in for extra grip. Whether you’re working on an old compression faucet or a modern kitchen faucet, these screwdrivers make disassembly much easier.
Note: Always choose the right size screwdriver for the job. This helps prevent damage to the screw heads and makes your repairs go smoother.
Allen Wrench Set
You might not think of an Allen wrench set as one of your main faucet repair tools, but it comes in handy more often than you’d expect. Many faucet handles, especially in the kitchen or bathroom, use small set screws to hold the handle in place. These screws often hide under a cap or on the side of the handle. You’ll find that faucet manufacturers use different sizes, like 3/32 inch, 7/64 inch, or 1/8 inch, and sometimes even metric sizes for international brands. That’s why you need a full set with both SAE and metric options.
When you want to remove a faucet handle, just turn off the water, find the hidden set screw, pick the right Allen wrench, and loosen it. Using the correct size makes the job easy and prevents the screw from stripping or spinning. High-quality Allen wrenches can handle the torque needed for stubborn screws without bending or breaking. If you ever run into a stripped screw, having an extractor set nearby helps, but most of the time, the right Allen wrench will do the trick. With this tool, you can take off handles smoothly and get to the parts inside your faucet that need fixing.
Tip: Keep your Allen wrenches organized in a holder or pouch. This way, you’ll always have the right size ready when you need it.
Slip-Joint Pliers
Slip-joint pliers are a must-have for any homeowner’s toolkit. These pliers have a pivot point that lets you adjust between two jaw sizes, so you can grip nuts, bolts, or pipes of different sizes. They’re lighter and smaller than channel locks, which makes them easy to handle, especially in tight spaces under the sink. When you work on a faucet, you’ll often need to loosen or tighten connections that a wrench can’t grip. Slip-joint pliers give you the versatility to turn, hold, or secure parts of various shapes and sizes.
You can also use them to pull out washers, O-rings, or other small parts during a faucet repair. If you’re working with polished chrome or delicate finishes, wrap the jaws with a cloth to avoid scratches. Their adjustability and versatility make them perfect for quick fixes and small adjustments. You’ll find yourself reaching for these pliers again and again, whether you’re working on a kitchen faucet or a bathroom sink.
Quick jaw adjustment for different sizes
Lightweight and easy to maneuver
Great for pulling out small parts or making minor adjustments
Channel Locks
Channel locks, also known as tongue and groove pliers, take your faucet repair skills to the next level. These pliers have serrated jaws that you can adjust by sliding along grooves, so they grip pipes and fittings of many sizes. They’re a favorite among plumbers for tightening or loosening pipe fittings, gripping pipes securely, and installing or adjusting faucets and showerheads. The adjustable jaws and strong grip make channel locks ideal for plumbing tasks where you need extra power.
Compared to slip-joint pliers, channel locks offer more adjustment positions and a much more secure grip. They often have self-locking features and ergonomic handles, which means less slipping and less effort for you. When you’re working on a stubborn kitchen faucet or need to grip a large pipe, channel locks give you the control and strength you need. While slip-joint pliers are great for general use, channel locks are the go-to tool for tougher jobs and larger fittings.
Note: Always use channel locks with care. Their strong grip can damage delicate finishes if you’re not careful, so consider using a cloth or rubber pad for protection.
Water Pump Pliers
Water pump pliers are a staple in any set of faucet repair tools. You might hear them called channel-type pliers, and they stand out because of their wide, adjustable jaws. These pliers give you the grip and leverage you need when a faucet part just won’t budge. If you ever try to remove a stuck aerator or a stubborn nut, water pump pliers make the job much easier.
Here’s how you can use water pump pliers to tackle tough faucet parts:
Try to remove the faucet aerator by hand first. If it won’t move, grab your water pump pliers.
Wrap a rag or some masking tape around the aerator. This protects the metal from scratches.
Grip only the aerator with the pliers. Avoid grabbing the faucet spout.
Turn the aerator counter-clockwise to loosen it.
If it stays stuck, reposition the pliers and try again. Work slowly to avoid bending the metal.
Don’t squeeze too hard. Too much pressure can damage soft metal parts.
If the aerator still won’t move, you can try a little heat or a drop of penetrating oil.
You’ll find water pump pliers especially helpful when you run into old, corroded faucet parts. They give you the extra strength you need without much effort. Just remember to protect the finish, and you’ll avoid leaving marks on your faucet.
Tip: Always keep a rag handy when using pliers on visible faucet parts. It keeps your fixtures looking new.
Plumber’s Tape
Plumber’s tape, also known as pipe thread tape or PTFE tape, is a must-have for leak-free faucet repairs. This thin, white tape wraps around threaded pipe joints and fittings. It creates a watertight seal and helps you screw parts together smoothly. If you want to stop leaks at the source, plumber’s tape is your go-to solution.
Here’s how you use plumber’s tape for faucet repairs:
Turn off the water supply before you start.
Unscrew the leaking joint and remove any old tape or debris.
Clean the threads so the new tape sticks well.
Wrap the tape clockwise around the threads, starting from the second thread.
Use 4-6 wraps for a snug fit. Make sure the tape covers the threads but doesn’t hang over the edge.
Screw the parts back together and test for leaks.
Plumber’s tape works fast—there’s no waiting for it to cure. You can reassemble your faucet right away. Using the right amount and wrapping it in the correct direction helps you get a tight, leak-free connection every time.
Note: Silicone tape is only for temporary fixes on pipe cracks, not for threaded joints.
Plumber’s Grease
Plumber’s grease is another essential item for anyone learning faucet repair tools. This special lubricant keeps your faucet parts moving smoothly and protects them from water damage. When you apply plumber’s grease to O-rings, washers, and valve stems, you help prevent corrosion and wear. The grease forms a barrier that keeps moisture out and reduces friction. This means your faucet handles turn easily, and the seals stay tight. Over time, plumber’s grease helps your faucet last longer and keeps repairs simple. You won’t have to deal with stuck valves or squeaky handles as often.
If you want your faucet to work like new, don’t skip this step. A small dab of plumber’s grease goes a long way toward keeping everything in top shape.
Faucet Rebuild Kit
You might feel overwhelmed when you see all the small parts inside a faucet. That’s where a faucet rebuild kit comes in handy. These kits include everything you need to fix most common faucet problems. You’ll usually find new springs, seats, O-rings, and sometimes even handles or screws. When you use a rebuild kit, you don’t have to hunt for each part separately. This saves you time and makes the repair process much smoother.
Most faucet repair kits are designed for specific brands or models. Before you buy one, check your faucet’s make and model. If you’re not sure, take a picture of your faucet or bring the old parts to the store. Using a rebuild kit can help you stop leaks, fix drips, and restore smooth handle movement. You’ll feel more confident knowing you have all the right parts in one package.
Tip: Always turn off the water supply before you start any repair. Lay out all the parts from the kit so you can see what you have.
Replacement Washers and O-Rings
Leaky faucets often need new washers or O-rings. These small rubber parts create a tight seal inside your faucet. Over time, they wear out or crack, which leads to drips and wasted water. You can buy replacement washers and O-rings at any hardware store. They come in different sizes, so it helps to bring the old ones with you for a match.
When you replace these parts, you fix leaks and help your faucet last longer. You don’t need special skills—just a screwdriver and maybe some pliers. Remove the handle, take out the old washer or O-ring, and put in the new one. Make sure everything fits snugly before you put the faucet back together. This simple repair can save you money and prevent bigger plumbing problems.
Note: If your faucet keeps leaking after you change the washers, you might need a full rebuild kit or help from a plumber.
Silicone Sealant
Silicone sealant is a must-have for faucet repairs and installations. It creates a strong, waterproof seal around your faucet base and other plumbing fixtures. You’ll find that silicone works better than regular caulk because it stays flexible and doesn’t crack over time. It sticks well to metal and plastic, so you can use it on almost any surface in your kitchen or bathroom.
Here’s why silicone sealant is so useful for faucet repairs:
Forms a strong, waterproof, and airtight seal to prevent leaks.
Remains elastic and durable, even in humid or hot environments.
Sticks to many surfaces, including metal and plastic.
Resists mold and mildew, which keeps your faucet area cleaner.
Withstands high temperatures and pressure, so the seal lasts longer.
Easy to clean up before it dries, but tough to remove once cured.
When you use silicone sealant, apply it carefully around the faucet base or gasket. Wipe away any extra before it dries. You’ll need to wait 24 to 72 hours for it to cure fully. Don’t rush this step—turning on the water too soon can ruin the seal. Silicone sealant costs a bit more than regular caulk, but it gives you a longer-lasting fix.
Tip: Use a tube with a long applicator for precise application. Always let the sealant dry completely before using your faucet.
Flashlight
You might not think of a flashlight as a plumbing tool, but it quickly becomes one of your best friends during faucet repairs. Most sinks and cabinets have dark, cramped spaces that make it hard to see what you’re doing. A good flashlight lights up those hidden corners, so you can spot leaks, find screws, and check for worn-out parts without straining your eyes.
Many homeowners prefer headlamps for these jobs. When you wear a headlamp, you keep both hands free to work on the faucet. This makes every step easier and safer. You don’t have to juggle a flashlight or ask someone to hold it for you. Headlamps also let you adjust the beam, so you can focus light exactly where you need it. This helps you see small details, like tiny screws or O-rings, and reduces mistakes.
Here’s why a flashlight or headlamp is essential for faucet repairs:
Lights up dark, tight spaces under sinks and inside cabinets.
Lets you use both hands for repairs when you choose a headlamp.
Keeps the work area safe by showing hazards you might miss in low light.
Offers adjustable beams for precise lighting on small parts.
Stays secure and comfortable, even when you move around in awkward spots.
If you want to avoid frustration and finish repairs faster, always keep a flashlight or headlamp in your toolkit. You’ll thank yourself the next time you’re working under the sink and need a clear view.
Bucket and Towels
Water has a way of getting everywhere during faucet repairs. Even if you turn off the water supply, a little water often remains in the pipes or faucet. That’s where a bucket and towels come in handy. Place a bucket under the sink before you start. It catches any water that drips out when you disconnect hoses or remove parts. Lay towels on the cabinet floor or nearby surfaces to soak up spills and protect your cabinets and floors.
Using towels or buckets to contain leaking water during faucet repairs helps prevent damage to floors and cabinetry by catching or soaking up the water.
Buckets and towels do more than just keep things tidy. They help you avoid slipping on wet floors and stop water from seeping into wood or causing mold. If you ever drop a small part, a towel can also keep it from bouncing away or getting lost. These simple items save you time on cleanup and protect your home from water damage.
Buckets catch water from pipes and hoses.
Towels soak up drips and prevent puddles.
Both help keep your workspace safe and dry.
Don’t skip this step. A little preparation with a bucket and towels can make your faucet repair much less stressful.
How to Use Faucet Repair Tools
Loosening and Tightening Nuts
You’ll often start a faucet repair by loosening or tightening nuts. These nuts hold the faucet in place and connect water lines. Grab your adjustable wrench or basin wrench for this job. The basin wrench works best in tight spaces under the sink, while the adjustable wrench handles nuts you can reach easily.
Before you begin, always shut off the water supply. This step prevents water from spraying everywhere and causing damage. Put on sturdy gloves and safety goggles to protect your hands and eyes. Good lighting helps you see what you’re doing, so use a flashlight or headlamp if needed.
When you loosen a nut, use gentle, steady pressure. Don’t yank or force it. If the nut feels stuck, try a little penetrating oil and wait a few minutes. Avoid overtightening when you put things back together. Too much force can strip threads or crack fittings, which leads to leaks. Always start with hand tightening, then use your wrench for a snug fit.
Tip: Lay down towels or a waterproof mat to catch drips and protect your floor.
Common mistakes include using the wrong tool, overtightening, or forgetting to turn off the water. Take your time and double-check each step to avoid these problems.
Removing Faucet Handles
Removing faucet handles is a key step in fixing a dripping faucet or replacing worn parts. Most handles attach with a set screw, which you’ll find under a decorative cap or on the side. Use a flathead or Phillips screwdriver, or sometimes an Allen wrench, to remove the screw.
First, cover the drain with a towel so you don’t lose small parts. Clean around the screw to prevent slipping. If the handle feels stuck, spray a little lubricant and let it sit. You can also use gentle heat from a hairdryer to loosen grime. If the handle still won’t budge, wrap a towel around it and use an adjustable wrench for extra grip. Tap gently with a rubber mallet if needed, but never force it. For stubborn handles, a strap wrench can help without scratching the finish.
Note: Take photos as you go. This helps you remember how everything fits back together.
Replacing Washers and O-Rings
A common cause of faucet leaks is worn washers or O-rings. Fixing these parts often stops a dripping faucet and saves water. Here’s how you do it:
Turn off the water supply by twisting the valves under the sink.
Plug the drain with a rag or stopper.
Remove the decorative cap and unscrew the handle.
Use pliers or a wrench to take off the packing nut and pull out the stem.
Slide off the old washer and O-ring. Take them to the store for an exact match.
Place the new washer and O-ring in the same spots.
Reassemble the faucet in reverse order.
Turn the water back on and check for leaks.
Always use the right size parts. Mismatched washers or O-rings won’t seal properly and can cause more leaks. If you’re unsure, ask for help at the hardware store.
Replacing washers and O-rings is one of the easiest ways to fix a leaky faucet and stop a dripping faucet for good.
Applying Plumber’s Tape and Grease
When you want to stop leaks at the source, plumber’s tape and grease are your best friends. Plumber’s tape, also called Teflon tape, helps seal threaded pipe joints so water can’t sneak through. Grease keeps moving parts working smoothly and prevents them from sticking or wearing out.
Here’s how you can apply plumber’s tape like a pro:
Clean the threads on the pipe with a rag. Dirt or old tape can mess up the seal.
Place the end of the tape on the second thread from the pipe’s end. Hold it in place with your finger.
Wrap the tape clockwise, matching the direction you’ll screw the pipe into the fitting. This keeps the tape from unraveling.
Keep the tape tight and flat as you wrap. Overlap the tape as you go.
Wrap it around the threads four to six times. Don’t use too much—too many layers can make it hard to fit the parts together.
Tear the tape and smooth the loose end over the threads.
Some plumbers like to add a thin layer of pipe thread sealant (pipe dope) on top of the tape. This combo gives you a leak-proof seal and makes it easier to take things apart later. Use high-quality tape and dope for the best results. Avoid using these on pipes that use gaskets or O-rings.
For plumber’s grease, just dab a small amount on O-rings, washers, and valve stems. This keeps everything moving smoothly and helps prevent leaks. Don’t use too much—a thin layer is all you need.
Tip: Always wrap tape clockwise. If you go the other way, the tape will unravel when you tighten the fitting.
Using a Faucet Rebuild Kit
A faucet rebuild kit can save you time and frustration. These kits come with all the small parts you need, like springs, seats, O-rings, and washers. You don’t have to hunt for each piece at the hardware store.
To use a rebuild kit, follow these steps:
Turn off the water supply and open the faucet to drain any leftover water.
Remove the handle and any decorative caps. Use a screwdriver or Allen wrench as needed.
Take out the old parts, like the stem, washers, and O-rings. Lay them out in order so you remember where everything goes.
Match the new parts from the kit to the old ones. Replace each part one at a time.
Apply plumber’s grease to moving parts before you put them back in.
Reassemble the faucet, turn the water back on, and check for leaks.
If you get stuck, check the instructions that come with your kit. Most kits are made for specific brands or models, so double-check before you buy.
Note: Take a photo before you start. It helps you remember how to put everything back together.
Cleaning and Sealing
Keeping your faucet clean and sealed helps prevent future leaks and keeps everything working smoothly. Regular cleaning removes mineral deposits and grime that can wear down parts.
Try these cleaning and sealing tips:
Wipe down your faucet with soap and water or a mix of vinegar and baking soda. This removes hard water stains and buildup.
Check for worn washers, O-rings, and gaskets. Replace them if they look cracked or damaged.
Tighten any loose connections, but don’t overdo it. Too much force can damage the parts.
Lubricate moving parts once a year with plumber’s grease. This keeps handles turning smoothly.
Inspect under the sink for leaks or moisture. Catching problems early saves you money and hassle.
Apply silicone sealant around the base of the faucet if you see gaps. This keeps water from seeping under the fixture.
Regular cleaning and sealing not only stop leaks but also help your faucet last longer.
Faucet Repair Guide
Ready to tackle your own faucet repairs? This faucet repair guide will walk you through every step, from preparation to fixing a leaky faucet and even how to replace a kitchen faucet. Grab your tools, roll up your sleeves, and let’s get started!
Preparation Steps
Before you dive into any kitchen faucet repair, you need to set yourself up for success. Here’s what you should do:
Shut Off Water Supply
Diagnose the problem first. Are you dealing with a leaky faucet, low water pressure, or another issue? Pinpoint the symptoms so you know what you’re fixing.
Figure out what type of faucet you have. Is it a compression, cartridge, ball, or ceramic disc faucet? This helps you choose the right approach and replacement parts.
Examine the faucet closely. Look for visible wear, rust, mineral buildup, or blockages. This inspection helps you spot the root cause of common kitchen faucet problems.
Always turn off the water supply before you start. Find the shut-off valves under the sink and turn them clockwise. If you can’t find them, you may need to turn off the main water supply for your home.
Open the faucet to drain any leftover water. This step relieves pressure and keeps your workspace dry.
Tip: Place a bucket under the sink to catch any drips when you disconnect water lines.
Gather Tools and Supplies
You don’t want to stop halfway through a repair because you’re missing a tool. Gather everything you’ll need:
Adjustable wrench
Basin wrench
Flathead and Phillips screwdrivers
Slip-joint pliers
Channel locks or water pump pliers
Plumber’s tape and plumber’s grease
Replacement parts (washers, O-rings, cartridges, or a faucet rebuild kit)
Silicone sealant
Flashlight or headlamp
Bucket and towels
Bring any old parts to the store to make sure you get exact matches for replacement parts. Organize your workspace so everything is within reach.
Wear Protective Gear
Safety comes first. Put on safety glasses or goggles to protect your eyes from splashes or debris. Wear gloves to keep your hands safe from sharp edges and chemicals. Good lighting helps you see what you’re doing, so use a flashlight or headlamp if needed.
Fix a Leaky Faucet
Fixing a leaky faucet is one of the most common kitchen faucet repair tasks. You can handle it with a few basic tools and a little patience.
Remove Handle and Valve
Cover the drain with a towel to prevent losing small parts.
Use a flathead or Phillips screwdriver to remove the decorative cap on the handle.
Loosen the set screw with an Allen wrench or screwdriver, then pull off the handle.
Use slip-joint pliers or a basin wrench to remove the packing nut.
Gently pull out the valve stem or cartridge, depending on your faucet type.
If the handle or nut feels stuck, apply a little penetrating oil and wait a few minutes.
Replace Damaged Parts
Now it’s time to inspect and replace damaged parts. Here’s what to look for based on faucet type:
For cartridge faucets, check the cartridge and O-rings. Replace any that look worn or cracked.
For compression faucets, inspect the washers and valve seats. Replace worn washers and clean or replace corroded valve seats.
For ball faucets, examine the ball valve and O-rings. Swap out any damaged pieces.
For ceramic disc faucets, remove the cartridge and check the ceramic discs and seals. Clean off mineral buildup and replace any broken parts.
Use plumber’s grease on new O-rings and washers to help them last longer. Make sure you use the correct replacement parts for your faucet.
Reassemble Faucet
Insert the new or cleaned parts back into the faucet body.
Tighten the packing nut with your wrench, but don’t overtighten.
Reattach the handle and secure it with the set screw.
Snap the decorative cap back in place.
Turn on the water supply and open the faucet slowly.
Test for leaks by running water and checking around the handle, spout, and base.
If you still notice drips after fixing a leaky faucet, double-check that all parts are seated correctly and tightened.
Replace a Kitchen Faucet
Sometimes, fixing a leaky faucet isn’t enough. If your faucet is old or damaged, you may need to replace a kitchen faucet entirely. Here’s a step-by-step guide to help you remove a kitchen faucet and install a kitchen faucet like a pro.
Disconnect Old Faucet
Remove anything blocking your access under the sink, like cleaning supplies or a garbage disposer. If you have a disposer, unplug it or turn off the circuit breaker.
Turn off the water supply valves under the sink. Open the faucet to drain any remaining water.
Place a bucket under the sink to catch water from the supply lines.
Use an adjustable wrench to loosen and disconnect the hot and cold water supply lines from the shut-off valves.
Use a basin wrench to loosen the mounting nuts that hold the faucet in place. If the nuts are stuck, apply penetrating oil and try again after a few minutes.
Disconnect the spray hose if your faucet has one.
Carefully lift the old faucet out from the top of the sink.
Clean the sink area with a putty knife and heavy-duty cleaner to remove old sealant and grime.
Install a Kitchen Faucet
If your new faucet requires a cover plate, apply silicone sealant to the gasket and position it over the sink holes.
Feed the faucet lines through the mounting hole(s) in the sink.
Under the sink, install washers and mounting nuts according to the faucet’s instructions.
Use a basin wrench or adjustable wrench to tighten the mounting nuts. Make sure the faucet is straight before fully tightening.
Attach the spray hose to the outlet tube if your faucet includes one. Secure the counterweight on the hose so it retracts smoothly.
Connect the hot and cold water supply lines to the shut-off valves. Wrap plumber’s tape around the threads for a leak-free seal.
Tighten the connections with your wrench, but avoid overtightening.
Wipe away any excess sealant around the faucet base.
Test for Leaks
Turn on the water supply valves slowly.
Open the faucet and let the water run for a minute.
Check for leaks under the sink, around the supply lines, and at the faucet base.
If you see any drips, tighten the connections a little more or reapply plumber’s tape as needed.
Test the spray hose and all faucet functions to make sure everything works smoothly.
Testing for leaks is the final and most important step. Don’t skip it! A quick check now can save you from water damage later.
Quick Reference Table: Tools for Each Step
Task | Tools Needed |
Shut off water supply | None (just your hands) |
Remove old faucet | Adjustable wrench, basin wrench, bucket, towels |
Clean sink area | Putty knife, heavy-duty cleaner |
Install new faucet | Basin wrench, adjustable wrench, plumber’s tape |
Test for leaks | Flashlight, towels |
With these step-by-step instructions, you can fix a leaky faucet, remove a kitchen faucet, and install a kitchen faucet with confidence. You’ll save money, learn new skills, and keep your kitchen running smoothly.
Safety and When to Call a Pro
Safety Tips
Before you grab your tools and start fixing a faucet, take a moment to think about safety. Even small repairs can lead to big problems if you skip the basics. Here are some key safety tips to keep you safe and protect your home:
Always turn off the water supply before you start any repair. This step helps you avoid flooding and water damage.
Put on protective gloves and goggles. Your hands and eyes need protection from sharp edges, hot water, and flying debris.
If your faucet has any electrical parts, disconnect the power. This prevents electric shock.
Read the manufacturer’s instructions for your faucet and tools. Following these steps helps you avoid mistakes and keeps you safe.
If you feel unsure or the job seems too complicated, call a professional. It’s better to ask for help than risk injury or property damage.
Tip: Keep your workspace dry and well-lit. Water and electricity do not mix, and good lighting helps you see small parts and avoid accidents.
You can handle most minor repairs with care and patience. Never rush, and double-check each step as you go.
Signs to Call a Professional
Sometimes, a faucet problem is more than just a simple fix. Knowing when to call a plumber can save you time, money, and stress. Here are some warning signs that mean you should pick up the phone instead of your wrench:
Slow draining sinks often point to deep clogs that need special tools.
Poor or no water pressure could mean a blockage or a bigger plumbing issue.
Water coming back up into your sink signals a back-flow problem.
Persistent sewer odors suggest a broken or clogged sewer line, which can be a health risk.
Brown or rusty water may mean your pipes are corroded and need expert inspection.
Multiple drains clogging at once usually means a main line blockage.
Noisy pipes, like banging or whistling, often come from air pockets or pressure problems.
Water heater issues, such as leaks or strange noises, can be dangerous and need a pro.
Burst pipes or sewer backups are emergencies. Call a plumber right away.
If you ever feel unsure about a repair, or if you lack the right tools or knowledge, don’t risk it. Professional plumbers have the training and equipment to fix problems safely and correctly.
Trying to fix complex plumbing issues yourself can make things worse. You might cause more leaks, damage your pipes, or even create safety hazards. When in doubt, trust an expert to handle the job.
Build Your Faucet Toolkit
Where to Buy Tools
You have plenty of options when it comes to buying faucet repair tools. Local hardware stores like Home Depot, Lowe’s, or Ace Hardware carry most of what you need. Staff can help you find the right size wrench or the best plumber’s tape. If you prefer shopping online, check out Amazon or the websites of big box stores. Online shopping lets you compare prices and read reviews before you buy. Sometimes, you can even find tool bundles that save you money. Don’t forget about local plumbing supply shops. These stores often have specialty items and knowledgeable staff who can answer your questions.
Tip: Take a photo of your faucet or the part you need to replace. Show it to the store staff for quick help.
Budget Options
You don’t have to spend a fortune to build a solid toolkit. Many stores offer affordable diy kits that include the basics for faucet repair. These kits usually come with a wrench, screwdrivers, plumber’s tape, and a few replacement washers or O-rings. They work well for most simple repairs. If you want to save even more, look for sales or check the clearance section. Sometimes, you can find gently used tools at garage sales or thrift shops. Borrowing from a friend or neighbor is another smart way to get started without spending much.
A table can help you compare your options:
Source | Pros | Cons |
Hardware Store | Immediate purchase, advice | Sometimes higher prices |
Online Retailer | Wide selection, reviews | Shipping wait time |
Thrift/Garage Sale | Very cheap, unique finds | Limited selection, used |
Affordable DIY Kits | All-in-one, beginner-friendly | May lack specialty tools |
Tool Maintenance
Taking care of your tools helps them last longer and work better. After each repair, wipe your tools clean with a dry cloth. Store them in a toolbox or a drawer to keep them organized and easy to find. If your tools get wet, dry them right away to prevent rust. Check moving parts, like wrenches and pliers, for dirt or grime. A drop of oil on the joints keeps them moving smoothly. Replace worn-out items, such as plumber’s tape or washers, so you’re always ready for your next diy project.
Keeping your toolkit organized saves you time and stress during your next faucet repair.
Having the right faucet repair tools gives you confidence as a new homeowner. You can fix leaks, replace parts, and keep your kitchen or bathroom running smoothly. With a little practice, you’ll find that most faucet repairs are simple and rewarding. Start building your toolkit today. Try out small repairs yourself, but remember, it’s always smart to call a professional if you feel stuck or unsure.
FAQ
What if I don’t have a basin wrench?
You can try using channel locks or slip-joint pliers. These tools sometimes fit in tight spots. If you still can’t reach the nut, you may need to buy or borrow a basin wrench.
How do I know which washer or O-ring to buy?
Take the old washer or O-ring to the hardware store. Match it by size and shape. Staff can help you find the right replacement. You can also check your faucet’s brand and model for part numbers.
Can I fix a faucet leak without turning off the water?
No, you should always turn off the water first. If you skip this step, water can spray everywhere. You might cause a mess or even damage your home.
How often should I check my faucet for leaks?
Check your faucets every few months. Look for drips, rust, or water stains. Early checks help you catch small problems before they turn into big repairs.
Is plumber’s tape the same as pipe dope?
No, plumber’s tape is a thin, white tape for sealing threaded joints. Pipe dope is a paste. Both stop leaks, but you use them in different ways. Most faucet repairs only need plumber’s tape.
What should I do if a nut won’t budge?
Spray a little penetrating oil on the nut. Wait a few minutes. Try again with your wrench or pliers. If it still won’t move, tap it gently with a rubber mallet. Don’t force it too hard.
Do I need to use silicone sealant every time I install a faucet?
You don’t always need silicone sealant. Use it if the manufacturer recommends it or if you see gaps around the faucet base. It helps prevent leaks and keeps water from getting under the fixture.
Where should I store my faucet repair tools?
Keep your tools in a dry toolbox or drawer. Wipe them clean after each use. Store small parts like washers and O-rings in labeled bags or containers. This way, you can find everything quickly when you need it.