![Top 10 Basic Hand Tools Every Homeowner Needs in 2025]()
Staying prepared for home maintenance in 2025 saves you time, stress, and money. According to the Hippo Housepower Report: Home Protection Priorities in 2025, 55% of homeowners plan to tackle repairs themselves as costs rise. You need a set of basic hand tools to handle common tasks like plumbing, painting, or even cleaning gutters. Here are the top 10 tools every homeowner should have:
Claw hammer
Screwdriver set
Cordless drill
Pliers
Adjustable wrench
Tape measure
Utility knife
Stud finder
Hex keys (Allen wrenches)
Level
If you’re a first-time homeowner, investing in quality basic tools gives you confidence for any project. Choose reliable options, and your screwdriver or drill won’t let you down when you need them most.
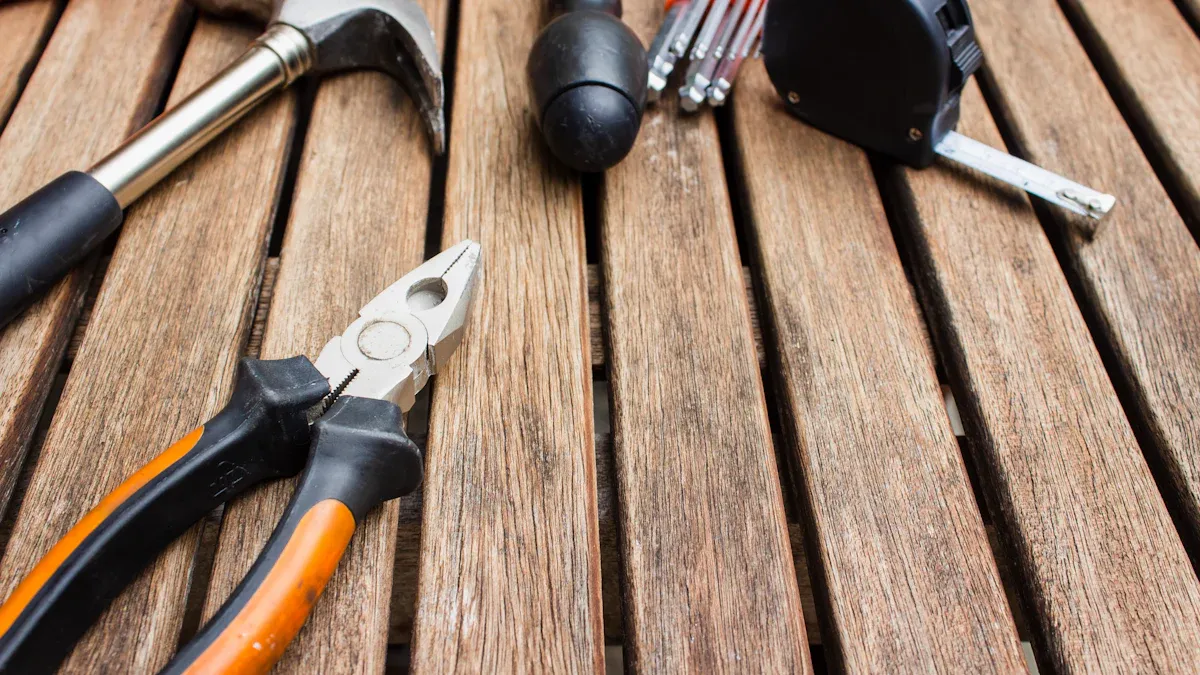
Must-Have Tools for Homeowners
![Must-Have Tools for Homeowners]()
Why Essential Tools Matter
You never know when a leaky faucet, loose cabinet, or wobbly shelf will pop up. As a homeowner, you need to feel ready for anything. That’s where a basic set of tools comes in. These must-have tools help you handle home maintenance, home repair, and even bigger home improvement projects without calling in a pro every time.
Having the right tools gives you confidence. You can fix things fast, save money, and keep your home in top shape. In 2025, homeowners face new challenges. Prices for repairs keep rising, and more people want to tackle home repairs themselves. A good set of basic hand tools is your first line of defense.
When you choose essential tools, think about what makes them right for you. Here are some things to look for:
Stick with brands that match your existing battery platforms. This saves you money and keeps everything compatible.
Pick tools based on how often you use them. If you do a lot of home improvement, go for pro-level options. For occasional fixes, affordable choices work well.
Durability matters. If you move your tools around or use them in tough spots, choose sturdy ones.
Safety features are important. Look for modern tools with lockout features and check for certifications and reviews.
Match the tool’s power to your needs. Don’t pay extra for features you won’t use.
You want tools that feel good in your hand. Ergonomic designs with non-slip grips make long jobs easier. Easy storage and transport also help. A toolbox or rack keeps your tools organized and ready for action.
Let’s talk about the top 10 essential tools every homeowner should have in 2025:
These basic tools cover almost every household repair or home improvement project you’ll face. They help you assemble furniture, hang shelves, fix fixtures, and measure spaces. Regular cleaning and proper storage keep your tools working well for years.
Tip: Invest in quality tools now. You’ll save time, money, and stress on future home repairs and home maintenance.
Claw Hammer
Uses
You probably reach for a hammer more than any other tool in your kit. It’s the go-to for so many home repairs and projects. Here’s a quick look at what you can do with a claw hammer:
| Use Category | Description |
| Driving and Pulling Nails | Hammering nails into wood or thin metal, and removing them with the claw. |
| Demolition Tasks | Prying apart materials, removing drywall, or dismantling wooden structures. |
| Carpentry and Woodworking | Assembling, adjusting, or repairing wood pieces for home improvement or carpentry projects. |
| DIY Projects | Hanging pictures, building furniture, and handling general handyman tasks. |
| Marking | Creating small indentations to mark spots on materials. |
You can use the hammer head to drive nails or even break small objects. The claw helps you pull out nails, pry things apart, or tear down debris. Sometimes, you’ll use it to tap nails back into place or make a quick mark before drilling.
Features
When you pick out a hammer, you want one that feels right in your hand and stands up to tough jobs. Here are some features to look for:
Weight: A 20-ounce hammer works well for most homeowners. It’s heavy enough to drive nails but light enough to control.
Handle Material and Grip: Molded steel or fiberglass handles with rubber grips give you a better hold and more comfort than wood.
Balance: A well-balanced hammer makes every swing easier and more accurate.
Claw Type: Curved claws help pull small nails, while straight claws work better for demolition or pulling big nails.
Cost: Most quality hammers cost between $20 and $30. Premium models with titanium heads cost more but last longer.
A good hammer should feel sturdy and balanced. If it feels awkward or slips in your hand, try another style. You’ll notice the difference during longer projects.
Tips
You can get more out of your hammer with a few simple tricks:
Always grip the handle near the end for more power and control.
Use the claw side to gently rock and pull nails instead of yanking straight up. This protects your wood and your wrist.
Store your hammer in a toolbox or hang it on a pegboard to keep it handy and prevent damage.
Clean the head and handle after messy jobs. Dirt and debris can cause rust or make the grip slippery.
If you’re working overhead or in tight spaces, choose a smaller hammer for better control.
Tip: Don’t use your hammer for jobs it wasn’t made for, like hitting masonry or metal bolts. You could damage the tool or hurt yourself.
A reliable hammer makes home repairs faster and easier. Once you get used to the feel of a good one, you’ll wonder how you ever managed without it.
Screwdriver Set
Types
You will use screwdrivers for almost every home project. A good screwdriver set covers all the basics. You want to make sure you have the right tool for every screw you find around your house. Here’s a quick guide to the most common types you’ll see in a standard set:
| Screwdriver Type | Description & Common Uses |
| Flathead (Slotted) | Original screwdriver with a single slot; common in older homes; used for electrical covers and furniture. |
| Phillips | Cross-shaped slot; most common in the U.S.; sizes #1, #2, #3; used in general construction and woodworking. |
| Robertson (Square) | Square head; popular in Canada and growing in the U.S.; resists slipping better than Phillips. |
| Hex-Head (Allen wrench) | L-shaped wrenches for hex screws; found on faucets, furniture (like IKEA), and appliances. |
| Torx | Six-pointed star-shaped head; better grip; used in appliances, HVAC, decking, and fencing. |
| Offset | Z-shaped handle for tight spaces; provides leverage; essential for clearance issues. |
| Multi-driver | Comes with interchangeable bits; versatile for many screw types; bits stored in handle for convenience. |
You will probably use flathead and Phillips screwdrivers the most. Flathead screwdrivers work well for electrical outlet covers and older furniture. Phillips screwdrivers fit most screws in construction and woodworking. If you run into square or star-shaped screws, you’ll need Robertson or Torx screwdrivers. Some screwdriver sets include a multi-driver, which lets you swap out bits for different jobs. This saves space and keeps your toolbox lighter.
Features
When you pick out a screwdriver set, you want tools that last and feel comfortable. Look for these features:
Magnetic tips: These help you hold screws in place, so you don’t drop them behind furniture or appliances.
Ergonomic handles: A comfortable grip makes long jobs easier and prevents hand fatigue.
Clearly marked sizes: You can grab the right screwdriver quickly if the size is easy to read.
Durable shafts: Hardened steel shafts resist bending and breaking, even with tough screws.
Variety of lengths: Short screwdrivers fit tight spaces, while longer ones give you more reach.
A quality screwdriver set usually comes in a sturdy case. This keeps your screwdrivers organized and easy to find. Some sets include a multi-driver handle with interchangeable bits. This gives you more options without taking up extra space.
Tips
You can get the most out of your screwdrivers with a few simple habits:
Always match the screwdriver tip to the screw head. Using the wrong size can strip the screw or damage the tool.
Keep your screwdrivers clean. Wipe off grease or debris after each use.
Store your screwdriver set in a dry place. Moisture can cause rust on the shafts.
Use a magnetic tray to hold screws while you work. This keeps them from rolling away.
Don’t use screwdrivers as pry bars or chisels. This can bend the shaft or break the tip.
Replace worn or damaged screwdrivers. A chipped tip can slip and cause injury.
Tip: If you work on electronics or small appliances, consider a precision screwdriver set. These tiny screwdrivers help you handle delicate screws without damage.
A reliable screwdriver set makes every home repair easier. You’ll reach for these tools again and again, whether you’re tightening cabinet handles or assembling new furniture.
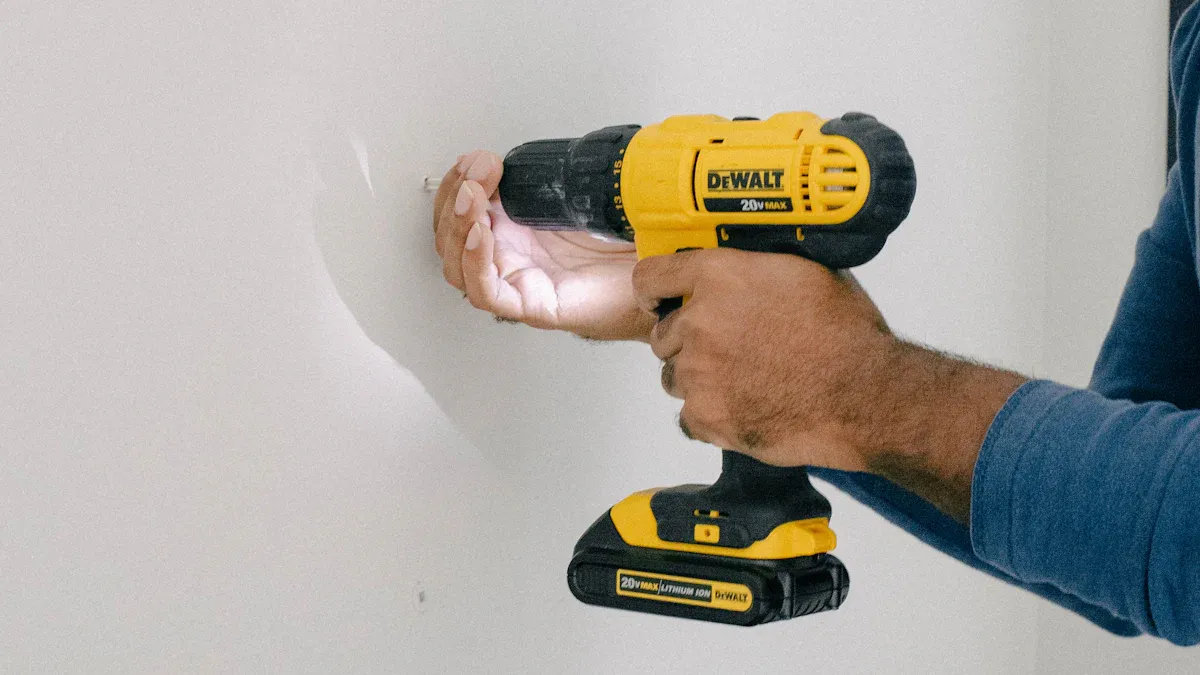
Cordless Drill
![Cordless Drill]()
Uses
A cordless drill is your best friend for home projects. You can use it to hang shelves, assemble furniture, or fix loose hinges. This tool makes quick work of drilling holes in wood, drywall, or even light metal. You can also drive screws with ease, which saves your wrists from twisting. Many homeowners use a drill to install curtain rods, mount TVs, or build outdoor planters. If you want to tackle DIY projects, you need a drill in your toolkit.
You can use a drill for:
Drilling holes for anchors, screws, or bolts
Driving screws into wood, plastic, or metal
Mixing paint or grout with special attachments
Installing shelves, cabinets, or curtain rods
Assembling flat-pack furniture
Removing screws or bolts with the reverse function
A drill gives you speed and power that a manual screwdriver cannot match. You finish jobs faster and with less effort.
Features
When you shop for a drill, you want one that fits your needs. Not all drills are the same. Here are some features to look for:
| Feature | Why It Matters |
| Voltage | 12V drills work for most home jobs. 18V or 20V models handle tougher tasks. |
| Chuck Size | 1/2 inch chucks fit bigger bits for heavy-duty work. 1/4 inch chucks suit light jobs. |
| Battery | Lithium-ion batteries last longer and charge faster. |
| Weight & Ergonomics | Lightweight drills reduce fatigue. A balanced grip helps you work longer. |
| Torque Adjustment | Lets you control force to avoid stripping screws. |
| Speed Settings | Two or more speeds help with both delicate and tough jobs. |
| Keyless Chuck | Makes changing bits quick and easy. |
| LED Light | Lights up dark corners and tight spaces. |
| Brushless Motor | Runs cooler and lasts longer, great for frequent use. |
| Brand & Warranty | Trusted brands offer better reliability and support. |
You want a drill that feels good in your hand. A heavy drill gives you more power, but it can tire you out during long jobs. For most home repairs, a 12V drill works well. If you plan to build decks or work with masonry, choose an 18V or 20V drill.
Tip: Look for a drill with a keyless, all-metal chuck. You can swap bits fast and the chuck lasts longer.
Tips
You can get the most from your drill with a few smart habits:
Charge your battery after each use. Keep a spare battery on hand for big projects.
Use the right bit for the job. Dull or wrong-sized bits can damage your drill or your project.
Adjust the torque setting to match your material. Lower torque for soft wood, higher for tough jobs.
Clean your drill after messy work. Dust and debris can shorten its life.
Store your drill in a dry place. Moisture can harm the battery and motor.
Use the built-in LED light to see in dark spaces.
Hold the drill with both hands for better control, especially when drilling into hard materials.
Always wear safety glasses when you use a drill.
A cordless drill makes home repairs and DIY projects much easier. Once you get used to it, you will wonder how you ever managed without one. If you want to invest in just one power drill, pick a model that matches your needs and feels comfortable to use.
Pliers
Types
You will find that pliers are some of the most versatile tools in your kit. They help you grip, twist, cut, and hold all sorts of materials. Not all pliers work the same way, so it helps to know which type fits your project. Here are the most common types you should keep handy:
Long-nose (Needle Nose) Pliers: Perfect for reaching into tight spaces, gripping small objects, and handling electrical work.
Diagonal Cutting Pliers: These cut wires and cables cleanly, making them essential for electrical repairs.
Tongue-and-Groove (Channel Lock) Pliers: Adjustable jaws with serrated teeth give you a strong grip, great for plumbing and automotive jobs.
Locking (Vise Grip) Pliers: You can lock the jaws in place for clamping or gripping, which comes in handy when you need an extra set of hands.
Wire Stripping Pliers: These remove insulation from wires without damaging the metal inside.
Crimping Pliers: Use these to attach connectors to wires, especially for electrical projects.
Linesman Pliers: These handle gripping, twisting, cutting, and bending wires.
Bent-nose Pliers: The angled jaws help you work in tight or awkward spaces.
Fencing Pliers: Multi-functional for fence installation and repairs.
You might not need every type, but having a few key pliers covers most home repairs.
Features
When you shop for pliers, you want tools that last and feel comfortable. The best pliers use high-quality steel alloys, which means they hold their edge and resist breaking. Manufacturers use special heat treatments to balance hardness and flexibility, so your pliers stay tough without becoming brittle. Look for induction-hardened cutting edges and gripping surfaces. These features help your pliers handle heavy loads and last for years.
A well-made joint is important. Smooth operation and no wobble mean you get better control. Ergonomic handles with non-slip grips reduce hand fatigue and help you work longer. Some pliers have optimized force distribution, so you use less effort and get more power. You want pliers with precise cutting angles and sharp edges for safe, clean cuts.
Tip: Choose pliers with a comfortable grip and sturdy construction. You will notice the difference during long projects.
Tips
You can get the most out of your pliers with a few simple habits:
Always match the pliers to the job. Use cutting pliers for wires and gripping pliers for turning or pulling.
Keep your pliers clean and dry. Wipe them down after each use to prevent rust.
Store pliers in a toolbox or hang them on a pegboard for easy access.
Don’t use pliers as a hammer or pry bar. This can damage the tool and make it unsafe.
Check the joint for smooth movement. If it feels stiff, add a drop of oil.
Replace pliers with worn or chipped jaws. Damaged pliers can slip and cause injury.
Use insulated pliers for electrical work to protect yourself from shocks.
Practice using different types of pliers so you know which one works best for each task.
Always wear safety glasses when cutting wire or metal.
If you work in tight spaces, try bent-nose or needle nose pliers for better reach.
With the right pliers, you can tackle almost any repair around the house. They make tough jobs easier and help you work safely and efficiently.
Adjustable Wrench
Uses
You will find an adjustable wrench handy for so many jobs around your home. This tool helps you tighten or loosen nuts and bolts on furniture, appliances, and plumbing fixtures. You do not need a whole set of wrenches in different sizes. The adjustable wrench lets you change the jaw width, so it fits many fastener sizes. This makes it a go-to tool for quick fixes.
You might use a wrench to assemble a new bed frame, fix a leaky faucet, or adjust a bike seat. If you need to work on your washing machine or dishwasher, you will probably reach for your wrench. It also comes in handy when you need to install or remove showerheads, tighten pipe connections, or repair outdoor equipment. The adjustable feature means you can handle both small and large bolts without switching tools.
Tip: Keep your wrench in your main toolbox. You will grab it more often than you think!
Features
When you shop for a wrench, look for features that make your work easier. The most important part is the adjustable jaw. You turn a thumbwheel to open or close the jaws, so you get a snug fit on any nut or bolt. This helps prevent slipping and damage.
Here are some features to consider:
Jaw Capacity: A wrench with a wide jaw can handle bigger bolts. Most homeowners do well with a 6-inch or 8-inch wrench.
Material: Choose a wrench made from chrome-vanadium steel. This metal resists rust and lasts longer.
Handle Grip: A non-slip grip gives you better control, especially if your hands are wet or oily.
Scale Markings: Some wrenches have size markings on the jaw. This helps you set the right width quickly.
Slim Profile: A thin wrench fits into tight spaces, like under sinks or behind appliances.
| Feature | Why It Matters |
| Adjustable Jaw | Fits many bolt sizes |
| Strong Material | Lasts longer, resists rust |
| Good Grip | Safer and more comfortable to use |
| Size Markings | Faster adjustments |
| Slim Design | Reaches tight spots |
Tips
You can get the most out of your wrench with a few simple habits. Always check that the jaws fit snugly on the nut or bolt before you turn. If the fit is loose, the wrench might slip and round off the corners. Turn the wrench slowly and keep steady pressure. This helps you avoid damaging the fastener.
Keep your wrench clean and dry after each use. Wipe off any grease or dirt. Store it in a dry place to prevent rust. If the thumbwheel gets stiff, add a drop of oil to keep it moving smoothly.
Note: Never use your wrench as a hammer or pry bar. This can bend the jaws and make the tool unsafe.
If you work on plumbing, use a wrench with a longer handle for extra leverage. For delicate jobs, a smaller wrench gives you better control. Practice adjusting the jaw with one hand, so you can work faster in tight spots.
A good wrench saves you time and frustration. Once you get used to it, you will wonder how you managed without one.
Tape Measure
Uses
You will reach for a measuring tape almost every time you start a home project. This tool helps you get the right size, fit, and placement for anything you want to build or fix. Here are some of the most common ways you will use a measuring tape at home:
Flooring installations: Measure floor areas, tiles, or planks to make sure everything fits perfectly. You can check gaps and angles for tricky corners.
Furniture placement: Use a measuring tape to check room size and furniture dimensions. This helps you plan where to put your couch, table, or bed so your space feels balanced.
Home renovations: Measure walls, doors, windows, and ceilings before you cut or install anything. You can mark spots for cuts, joints, or openings and keep everything lined up.
DIY projects: Whether you build a shelf, hang curtains, or paint a wall, a measuring tape gives you the exact numbers you need. You avoid mistakes and save time.
A measuring tape is your best friend for any project that needs accuracy. You will find yourself using it for small fixes and big upgrades.
Features
Modern measuring tapes have come a long way. You get more than just a strip of metal with numbers. The best measuring tapes give you accuracy, comfort, and durability. Here is a quick look at what makes a measuring tape reliable:
| Aspect | Evidence Summary |
| Accuracy Testing | Manufacturers test measuring tapes against gauge blocks and steel rules to make sure you get precise results. |
| Markings | Clear, easy-to-read numbers and fractions printed on the blade help you read measurements fast. |
| Hook Design | Strong, well-designed hooks grab onto objects and keep the tape steady. |
| Blade Coating | Special coatings cut down glare and protect the blade from wear and tear. |
| Blade Control | Features like autolock and finger brakes let you control how far the tape extends and retracts, so you avoid errors. |
| Standout | A wide, sturdy blade stands out farther without bending, making it easier to measure long distances alone. |
| Magnetic Hooks | Magnetic tips hold the tape in place on metal surfaces, giving you extra stability. |
| Product Examples | Brands like Irwin Strait-Line and Milwaukee Compact Autolock offer sturdy, accurate measuring tapes with helpful features. |
You want a measuring tape that feels solid in your hand. Look for one with a smooth, easy-to-read blade and a hook that grabs onto edges. If you work alone, a tape with a strong standout and magnetic tip makes the job much easier.
Tips
You can get the most out of your measuring tape with a few simple habits. Always pull the blade out slowly and keep it straight. This helps you avoid bends or kinks. When you measure, hook the end onto the object and keep the tape flat. Read the numbers at eye level for the best accuracy.
Keep your measuring tape clean and dry. Wipe off dust or debris after each use. Store it in a toolbox or hang it on a pegboard so you always know where it is. If your tape has an autolock, use it to hold the blade in place while you mark your spot. For long measurements, use the standout feature to extend the blade without help.
Tip: Replace your measuring tape if the blade gets bent or the markings fade. A worn-out tape can lead to mistakes and wasted materials.
A good measuring tape saves you time and frustration. You will use it for almost every project, big or small. Once you find one you like, you will wonder how you ever managed without it.
Utility Knife
Uses
A utility knife is one of those tools you reach for again and again. You might not realize how many jobs it handles until you start using one. Need to open a package that just arrived? Grab your utility knife. Want to trim some paper or photos for a project? This tool makes it easy. You can even use it in the kitchen for certain food prep tasks if you have a chef-style utility knife.
Here are some of the most common ways you’ll use a utility knife at home:
Open boxes and packaging quickly and cleanly.
Slice open letters without tearing the contents.
Trim lightweight materials like paper, photos, or laminated documents.
Cut ropes, strapping, or wires for crafts or repairs.
Slice ingredients in the kitchen, such as meats, vegetables, fruits, and herbs, especially with a chef utility knife.
You’ll find that a sharp utility knife saves you time and helps you work more neatly. Whether you’re working on a DIY project, organizing your home, or prepping dinner, this tool comes in handy.
Features
When you shop for a utility knife, you want something that feels good in your hand and stands up to daily use. Look for a knife with an ergonomic handle. This design reduces strain on your hand and wrist, so you can cut for longer without discomfort. Some handles even have a special slider, like the Ergo Pull™, which makes it easier to control the blade and keeps your fingers safe.
Blade quality matters, too. Many modern utility knives use ceramic blades. These blades stay sharp longer, resist rust, and are safer for your fingers. If you have limited hand strength or dexterity, a finger-friendly® ceramic blade can help you avoid accidental cuts.
You also want a knife with a reliable blade retraction system. Spring-loaded sliders or self-retracting blades pull the blade back when you’re done cutting. This feature keeps the blade out of the way and lowers the risk of injury. Some knives offer manual retraction, so you can control exactly when the blade is exposed.
Storage is another key feature. Look for a knife with a clip, magnet, or lanyard hole. These options let you keep the knife handy but safe, so you don’t accidentally touch the blade when reaching into a drawer or pocket.
Safety
Safety should always come first when you use a utility knife. Modern designs include several features to help protect you from cuts and other injuries. Here’s a quick look at what to consider:
| Safety Feature | Description & Safety Benefit |
| Ergonomic Handle Design | Reduces strain and helps prevent repetitive injuries. Special handles like the J-hook protect your fingers and guide your cuts. |
| Blade Retraction Mechanisms | Auto-retracting or spring-loaded sliders pull the blade back when not in use, reducing accidental cuts. |
| Blade Material & Design | Ceramic blades with a special grind are safer and last longer. They also help if you have limited dexterity. |
| Storage & Carrying Options | Clips, magnets, and lanyard holes keep the blade away from your skin and make storage safer. |
| Quality Construction | Durable materials prevent tool failure. Smooth sliders and secure blades lower the risk of accidents. |
Tip: Always retract the blade when you finish using your utility knife. Store it in a safe spot, out of reach of children. Replace dull blades right away—sharp blades are actually safer because they require less force and give you more control.
A good utility knife makes your work easier and safer. Choose one with the right features, and you’ll wonder how you ever managed without it.
Stud Finder
Uses
You probably don’t think about what’s behind your walls until you need to hang a heavy picture or mount a TV. That’s when a stud finder becomes your best friend. This tool helps you locate the wooden or metal studs hidden behind drywall, plaster, or even tile. You can use a stud finder to:
Hang shelves, mirrors, or cabinets safely
Mount TVs or large artwork without worrying about them falling
Install curtain rods or blinds with strong support
Avoid drilling into electrical wires or plumbing
Plan home improvement projects with confidence
A stud finder saves you from guesswork. You avoid making extra holes in your walls and keep your home looking neat. If you want to avoid costly mistakes, this tool is a must-have.
Features
Modern stud finders have come a long way from the simple magnetic models you might remember. Today’s devices use advanced technology to give you more accurate results and extra safety. Here’s a quick comparison:
| Feature/Technology | Older Stud Finders | Modern Stud Finders |
| Sensor Type | Magnetic or basic capacitive sensors | Multi-sensor arrays, radar (RF) technology |
| Calibration Requirement | Manual calibration needed | Often automatic or no calibration required |
| Detection Capability | Studs only, limited to wood or metal fasteners | Detects studs, pipes, wires, leaks, and even motion |
| Accuracy | Prone to false positives, less precise | High accuracy, automatic center detection, advanced signal processing |
| Wall Compatibility | Struggles with plaster, tile, or concrete | Works on drywall, plaster, tile, and concrete |
| User Interface | Simple LED or beep | Real-time visual feedback, smartphone integration |
| Extra Features | Basic stud detection | Filters out non-wood objects, detects wiring and plumbing, detailed diagnostics |
You’ll notice that electronic stud finders use multiple sensors to scan wall density and electrical properties. This means you can find not just studs, but also wires and pipes. Some models even connect to your smartphone, giving you a live view of what’s inside your wall. You get fewer false readings and more confidence before you drill.
Magnetic stud finders still have a place. They’re small, affordable, and easy to use. They work by finding metal fasteners in studs. However, they only give you a rough idea of where the stud is. Electronic models, on the other hand, offer deeper scanning and can spot live wires—something magnetic finders can’t do.
Tip: If you work on older homes or thick walls, choose an electronic stud finder with deep scan mode. You’ll get better results and avoid surprises.
Tips
You can get the most out of your stud finder with a few simple habits:
Start with a fresh battery for electronic models. Low power can affect accuracy.
Move the stud finder slowly and steadily across the wall. Rushing can cause false readings.
Begin with a shallow scan, then switch to deep scan if needed. This helps avoid confusion from pipes or wiring.
Mark both edges of the stud, then find the center for the strongest support.
If your stud finder has a live wire warning, pay attention. Never drill where wires are detected.
Wipe the wall surface before scanning. Dust or texture can interfere with sensors.
Practice on a wall where you know the stud locations. This builds your confidence and helps you learn how your tool works.
A reliable stud finder makes every wall project safer and easier. You’ll save time, avoid costly mistakes, and feel more confident tackling any DIY job.
Hex Keys (Allen Wrenches)
Uses
You probably have a set of hex keys tucked away in a drawer, even if you don’t realize it. These handy tools, also called Allen wrenches, show up everywhere in home projects. You’ll find them included with flat-pack furniture, ready for you to assemble desks, chairs, or shelves. When you see those little hexagonal bolts, you know it’s time to grab your wrench set.
You’ll use hex keys for more than just furniture. They come in handy for:
Putting together or taking apart furniture with hex-head fasteners.
Adjusting or repairing your bike, like tightening the seat post or handlebars.
Working on your car, especially for brake calipers or engine parts.
Fixing electronics or appliances that use hex screws.
You get a precise fit with a hex key. Other tools can slip or strip the bolt, but a wrench with the right size grips perfectly. That’s why you see these tools in so many kits.
Tip: Keep your hex keys in a spot you’ll remember. You’ll reach for them more often than you think!
Features
A good hex key set makes your life easier. You want a range of sizes, so you’re ready for any job. Most homeowner sets include both SAE (inch) and metric sizes. Here’s a look at the standard SAE sizes you’ll find:
| Hex Key Sizes Included in Typical Homeowner Set (SAE) |
| 0.05 inch |
| 1/16 inch |
| 5/64 inch |
| 3/32 inch |
| 7/64 inch |
| 1/8 inch |
| 9/64 inch |
| 5/32 inch |
| 3/16 inch |
| 7/32 inch |
| 1/4 inch |
| 5/16 inch |
| 3/8 inch |
You’ll notice that most sets come in a folding holder or a case. This keeps your wrenches organized and easy to grab. Some sets include ball-end keys, which let you turn bolts at an angle—super helpful in tight spots. Look for keys made from hardened steel. These last longer and won’t round off under pressure.
If you work on bikes or cars, you might want a T-handle wrench. This style gives you more grip and leverage. For small electronics, a mini set fits tiny screws without slipping.
Tips
You can get the most out of your hex key set with a few simple habits:
Always match the size of the wrench to the bolt. Using the wrong size can strip the fastener.
Insert the key fully before turning. This helps you avoid damaging the screw or the tool.
Clean your wrenches after use. Wipe off grease or dirt to keep them in good shape.
Store your set in its holder. You’ll save time searching for the right size.
If a bolt feels stuck, use a longer wrench for more leverage. Don’t force it—try a little penetrating oil first.
For hard-to-reach spots, try a ball-end key or a T-handle wrench.
Replace any bent or worn keys. A damaged wrench can slip and cause injury.
Note: If you lose a key from your set, you can buy replacements. Don’t try to use a size that’s “close enough”—it won’t work as well.
With a solid set of hex keys, you’ll breeze through furniture assembly, bike repairs, and even small appliance fixes. You’ll wonder how you ever managed without this simple but powerful tool.
Level
Uses
You might not realize how often you need a level until you start a home project. This tool helps you make sure everything sits straight and true. You use a level when you hang shelves, install cabinets, or put up picture frames. If you want your new TV to look perfect on the wall, you need a level. You also use it for bigger jobs like building a deck, laying tile, or setting fence posts.
A level helps you check both horizontal (level) and vertical (plumb) alignment. You can use it for small tasks, like making sure a towel rack is straight, or for larger projects, such as framing a wall. Some levels even help you create perfectly straight lines across long distances, which comes in handy for landscaping or installing gutters.
Tip: If you want to avoid crooked results and extra work, always grab your level before you start measuring or drilling.
Features
Levels come in many shapes and sizes. Each type works best for certain jobs. Here’s a quick look at the most common types and what makes them useful:
| Level Type | Description & Best Use | Accuracy & Durability Notes |
| Spirit (Bubble) | Classic tool with a bubble in liquid; general use | Reliable if vials are in good shape |
| Carpenter Level | Wooden, 2-4 ft; for shelves, borders, towel racks | Good for most home projects |
| Torpedo Level | Small, fits tight spaces; great for cabinets, rails | Portable, but harder to read at a glance |
| Box Level | Sturdy, resists bending; for most projects | Durable and accurate |
| I-Beam Level | Lightweight, less sturdy; budget-friendly | Prone to bending, less reliable over time |
| Water Level | Uses water in tubes; checks level over long distances | Great for decks, fences; setup takes practice |
| Post Level | Clips to posts; checks vertical alignment | Handy for fences and mailboxes |
| Line Level | Hangs on string; levels long lines (gutters, masonry) | Simple, but depends on string tension |
| Landscaping Level | For garden beds, retaining walls | Good for outdoor projects, less precise indoors |
| Digital Level | Digital readout, beeps when level | Easy to read, often more accurate |
| Laser Level | Projects laser lines; self-leveling | Super precise, great for tile, cabinets, decks |
Laser levels stand out for their precision. Some models, like the VEVOR self-leveling laser, can keep lines straight within ±1/9 inch at 33 feet or even 100 feet. That kind of accuracy makes them perfect for jobs where you need everything just right, such as tiling or framing. Digital levels also make your life easier with clear displays and sound alerts.
Tips
You get the best results from your level when you use it the right way. Here are some tips to help you out:
Always check that your level is clean. Dirt or debris can throw off your reading.
Test your bubble level by flipping it 180 degrees on the same surface. If the bubble stays in the same spot, your tool is accurate.
For long distances, try a water level or a laser level. These tools help you keep things straight across a big area.
Use a torpedo or post level for tight spots or vertical posts.
Store your level in a safe place. Dropping it can damage the vials or knock it out of alignment.
If you work outside, pick a level with a sturdy, weather-resistant body.
For the most precise jobs, use a laser or digital level. These tools save time and reduce mistakes.
Note: Bright sunlight can make laser lines hard to see. Try using a laser level indoors or in shaded areas for the best results.
A good level helps you finish projects faster and with fewer mistakes. Once you start using one, you’ll wonder how you ever managed without it.
Basic Tool Kit Setup
Choosing Essential Tools
Building your basic tool kit starts with picking the right tools for your needs. You want a set that covers most home repairs but doesn’t take up too much space. Most homeowners do well with a kit that has between 50 and 150 pieces. Look for a mix of screwdrivers, an adjustable wrench, pliers, a claw hammer, a measuring tape, and a level. These tools handle almost any job you’ll face around the house.
When you choose tools, focus on durability and performance. Pick items that can handle daily use and come with a good warranty. Ergonomic handles help you work longer without discomfort. If you plan to tackle bigger projects, consider adding a cordless drill or impact driver combo. These power tools make heavy tasks much easier.
Here’s a quick checklist for your homeowner's toolkit:
Measuring tape (25-foot is ideal)
Claw hammer
Screwdrivers with interchangeable heads
Nails and screws
Pliers (locking, needle-nose, channel-lock)
Wire cutters
Adjustable wrench or socket set
Heavy-duty flashlight
Stud finder
Cordless drill
Utility knife
Toolbox for storage
Tip: Read reviews and ask friends for recommendations before you buy. Reliable tools save you time and frustration.
Safety Gear
Safety should always come first when you use your tool kit. Even simple jobs can cause injuries if you’re not careful. Make sure you have the right safety gear before you start any project.
Safety glasses or goggles protect your eyes from flying debris. Some models fit over prescription glasses.
Latex gloves keep your hands safe from chemicals and sharp edges.
Dust masks or respirators help you avoid breathing in harmful particles, especially when you sand or cut materials.
Hearing protection, like earplugs or earmuffs, is important when you use power tools.
Keep your safety gear in your toolbox or nearby. You’ll be more likely to use it if it’s easy to grab.
Storage Tips
A well-organized tool kit makes every project easier. Store your tools in a sturdy toolbox or on a pegboard in your garage or closet. Use trays or small bins for nails, screws, and other fasteners. Label each section so you can find what you need fast.
Wipe down your tools after each use to prevent rust and dirt buildup. Check for damage before you put them away. Replace any worn or broken items right away. If you have power tools, keep batteries charged and store them in a dry spot.
Note: A tidy tool kit saves you time and keeps your tools in good shape for years.
Organizing Essential Tools
Storage Solutions
Keeping your tools organized makes every project smoother. You want to find what you need fast, and you don’t want to waste time searching for a missing screwdriver or wrench. Here are some of the best ways to store your hand tools at home:
Use wall-mounted storage like shelves, hooks, and magnetic strips. These options help you use vertical space and keep your tools in sight.
Try compact storage units such as toolboxes, rolling trolleys, stackable bins, or cabinets with drawers. These work well in small spaces and keep everything tidy.
Get creative with DIY storage. Repurpose mason jars for screws and nails, or use wooden crates and custom shelves to fit your space.
Hide tools in under-furniture bins or use foldable workstations. Some furniture even comes with built-in compartments for tools.
Choose portable storage if you move tools around. Roll-up tool bags, buckets with organizers, and tool pouches make it easy to carry what you need.
Keep your system organized by decluttering often. Label each storage area and always return tools to their spot after use.
If you have a big collection, large steel cabinets or chests work great in garages or workshops. Deep drawers with padding protect power tools, while shallow trays keep hand tools easy to grab. Drawer liners help prevent rust, and lockable wheels add both mobility and security. For smaller jobs, a portable toolbox or tool bag keeps clutter down and makes transport simple.
Tip: Start by sorting your tools into groups—like power tools, hand tools, and small parts. Create zones or use pegboards to keep similar items together. This way, you always know where to look.
Maintenance
Taking care of your tools helps them last longer and work better. You don’t need to spend hours on upkeep, but a little regular attention goes a long way. Here’s how you can keep your tools in top shape:
Lubricate moving parts to stop rust and keep everything working smoothly.
Check handle grips for wear and replace them if needed.
Use rust prevention sprays, especially if you live in a humid area.
Keep cutting tools sharp and clean for the best performance.
Inspect power tool cords for damage and swap them out if you see any fraying.
Calibrate adjustable tools now and then to make sure they stay accurate.
Sand and oil wooden handles so they don’t dry out or crack.
Protect your tools during transport with padded cases or tool belts.
Only use each tool for its intended job to avoid breaking it.
Set up a simple schedule for cleaning and checking your tools—maybe once a month or after big projects.
When you follow these steps, you get safer, more reliable tools. Well-maintained tools work better, last longer, and help you finish projects with fewer problems. You also save money because you won’t need to replace tools as often.
Note: Clean your tools after every use and store them in a dry place. This simple habit prevents rust and keeps everything ready for your next project.
Having these 10 basic hand tools gives you the power to handle repairs and home improvement projects with confidence. When you invest in quality tools, you save money over time because you avoid mistakes and costly rework. Start building your toolkit now so you’re ready for any homeowner challenge. Trusted brands like Leatherman, Gerber, and Victorinox make reliable options for your next project. Organize your tools for quick access, and you’ll always be prepared for whatever comes your way.
FAQ
What is the first tool I should buy for my home?
Start with a claw hammer. You will use it for hanging pictures, small repairs, and even light demolition. It is the most versatile tool for beginners.
How do I know if a tool is good quality?
Look for sturdy materials, comfortable grips, and trusted brands. Read reviews online. If a tool feels heavy and solid in your hand, it usually lasts longer.
Can I use one screwdriver for all screws?
No, you need different types and sizes. Flathead and Phillips screwdrivers cover most jobs. A multi-bit screwdriver set saves space and helps you handle many tasks.
How should I store my tools to keep them in good shape?
Keep your tools dry and clean. Use a toolbox, pegboard, or drawer organizer. Wipe tools after use to prevent rust. Store sharp tools with covers for safety.
Do I need power tools, or are hand tools enough?
Hand tools handle most home repairs. If you plan bigger projects, like building furniture or decks, add a cordless drill. For basic fixes, hand tools work great.
How often should I clean or maintain my tools?
Check your tools after every project. Wipe off dirt and moisture. Oil moving parts once a month. Replace worn or damaged tools right away.
What safety gear should I use with hand tools?
Wear safety glasses to protect your eyes. Use gloves for sharp or rough jobs. If you use power tools, add hearing protection. Always follow the tool’s safety instructions.
Can I use household items as tools in a pinch?
Sometimes, but real tools work better and safer. A butter knife might turn a screw, but it can slip or break. Invest in proper tools for the best results.