![12 Must-Have Woodwork Hand Tools Every Beginner Needs]()
Ready to dive into woodworking? Here are 12 must-have woodwork hand tools every beginner should know:
Tape measure
Combination square
Marking knife
Sliding bevel
Hand saw
Chisels
Utility knife
Block plane
Sharpening tools
Mallet
Clamps
Screwdrivers
These woodworking hand tools help you work safely, measure accurately, and complete projects with confidence. Most beginner woodworkers find that mastering basic woodworking tools like saws, chisels, and marking gauges leads to better results and fewer mistakes. Starting with essential tools for beginners gives you a solid foundation and helps you avoid common hazards. Focus on learning these essential hand tools first—each one will be explained in detail next!
Essential Woodworking Tools
Getting accurate measurements and clear markings is the first step to success in any woodworking project. If you want your pieces to fit together perfectly, you need to start with the right marking and measuring tools. These essential woodworking tools help you avoid mistakes, save material, and build projects that last.
Tip: The saying “measure twice and you will only need to cut once” is famous for a reason. Careful measuring and marking can save you time, money, and frustration.
Here’s how you can use these woodworking hand tools to get the best results.
Tape Measure
Uses
You’ll reach for your tape measure on almost every project. It helps you check board lengths, mark out cuts, and double-check your work before you start sawing. A good tape measure lets you measure both long and short distances quickly. You can use it to plan layouts, check diagonals for squareness, and even measure inside corners with ease.
Measuring and marking tools like the tape measure are essential for achieving precise layouts. Accurate measurements are the foundation of quality joinery and durable woodworking projects. If you want your work to look professional, you need to trust your measurements.
Buying Tips
When you shop for a tape measure, look for one that feels sturdy in your hand. Shock-resistant cases protect your tool if you drop it. Choose a tape with clear, easy-to-read markings—down to at least 1/16 or 1/32 of an inch. A reliable locking mechanism keeps the blade in place while you mark your lines.
Many woodworkers like tape measures from brands such as Stanley, Milwaukee, and DeWalt because they last a long time in the shop. Some newer models, like the REEKON T1 Tomahawk, offer digital displays and laser guides for extra accuracy. The FastCap ProCarpenter Tape has a built-in pencil sharpener and a spot for jotting down notes, which can be handy for beginners.
A tape measure between 16 and 25 feet is ideal for most woodworking hand tools collections. Magnetic hooks help when you work alone, and a wide blade that stands out unsupported makes solo measuring easier.
Combination Square
Uses
A combination square is one of the most versatile essential woodworking tools you’ll own. You can use it to check if your boards are square, mark 45° and 90° angles, and transfer measurements from one piece to another. The sliding head lets you set exact distances, which is great for marking out joinery or shelf pin holes.
This tool improves your accuracy at every stage. You can find the center of a board, mark repeating distances, and even set the height of your saw blade or router bit. The combination square’s design makes it comfortable to hold and easy to use often.
The sliding head acts as a reliable stop, so your layout lines stay square to the edges.
You can mark long, straight lines by sliding the square and pencil together.
It helps you set up your saws and fences for clean, safe cuts.
Maintenance
Keep your combination square clean and free of dust. Wipe the blade after each use to prevent rust, especially if it’s made of steel. Check the locking mechanism regularly to make sure it holds tight. If your square has a built-in level or scribe, make sure those parts stay in good shape. Store your square in a dry place to keep it accurate for years.
Marking Knife
Uses
A marking knife gives you the most precise lines possible. Unlike a pencil, which can leave a thick or fuzzy mark, a marking knife scores a razor-thin line right where you want to cut. This line acts as a physical guide for your saw or chisel, so you can start your cuts exactly on target.
You’ll find a marking knife especially useful for laying out joinery. The knife line severs wood fibers, which helps prevent tearout and chipping when you cut or chisel. It also makes it easy to transfer and extend layout lines, so your joints fit together perfectly.
The marking knife creates a thin, exact line that pencils can’t match.
The scored line gives your tools a place to rest, improving accuracy.
It helps you avoid mistakes caused by wide or unclear pencil marks.
Safety
Always handle your marking knife with care. The blade is sharp and can cut you if you’re not careful. Hold the knife with a firm grip and keep your fingers away from the cutting edge. When you’re done, store the knife with a blade cover or in a safe spot. Never leave it loose on your workbench.
Safety Reminder: Take your time when marking lines. Rushing can lead to slips and injuries. Respect your tools, and they’ll help you create great work.
Choosing the right marking and measuring tools for beginners makes a huge difference in your woodworking journey. Look for tools with durable materials, clear markings, and comfortable grips. These essential tools will help you build skills, stay safe, and enjoy every project.
Sliding Bevel
Uses
A sliding bevel, sometimes called a bevel gauge, helps you mark and measure angles that are not just 90° or 45°. You can adjust the blade to any angle you need, then lock it in place. This tool comes in handy when you want to copy an angle from one piece of wood to another or check if your cuts match a specific design.
Here’s how you might use a sliding bevel in your woodworking projects:
Set the blade to the angle you want by loosening the locking mechanism, usually a wingnut or screw.
Place the stock (the thicker part) against the edge of your wood.
Adjust the blade to match the angle you need, then tighten the lock so it stays put.
Use the blade as a guide to mark the angle with a pencil or marking knife.
Transfer the same angle to other pieces, so everything fits together perfectly.
You can also use a sliding bevel to check angles after you finish a cut. If you’re building something like a picture frame or a box with slanted sides, this tool makes sure your joints line up just right. The sliding bevel works well with other marking tools, like layout knives, to create crisp, accurate lines.
Tip: You don’t have to rely on numbers or protractors. Just match the sliding bevel to any angle you see, and you can copy it as many times as you need.
Tips
Getting the most out of your sliding bevel is easy if you follow a few simple tips:
Always make sure the locking mechanism is tight before you mark or cut. A loose blade can ruin your accuracy.
Keep the blade and stock clean. Dust or glue can make the tool slip or stick.
Store your sliding bevel in a dry place to prevent rust, especially if it has metal parts.
Practice setting and transferring angles on scrap wood before you start your main project.
Use the sliding bevel with a combination square for even more precise layouts.
If you’re just starting out, look for a sliding bevel with a comfortable grip and a locking mechanism that feels solid. Some models have brass fittings or wooden handles that last a long time and feel good in your hand. You don’t need anything fancy—just a reliable tool that holds its angle every time.
A sliding bevel opens up a world of creative possibilities. You can build projects with unique shapes, fit pieces together at odd angles, and make sure everything looks sharp and professional. Once you get the hang of it, you’ll wonder how you ever worked without one.
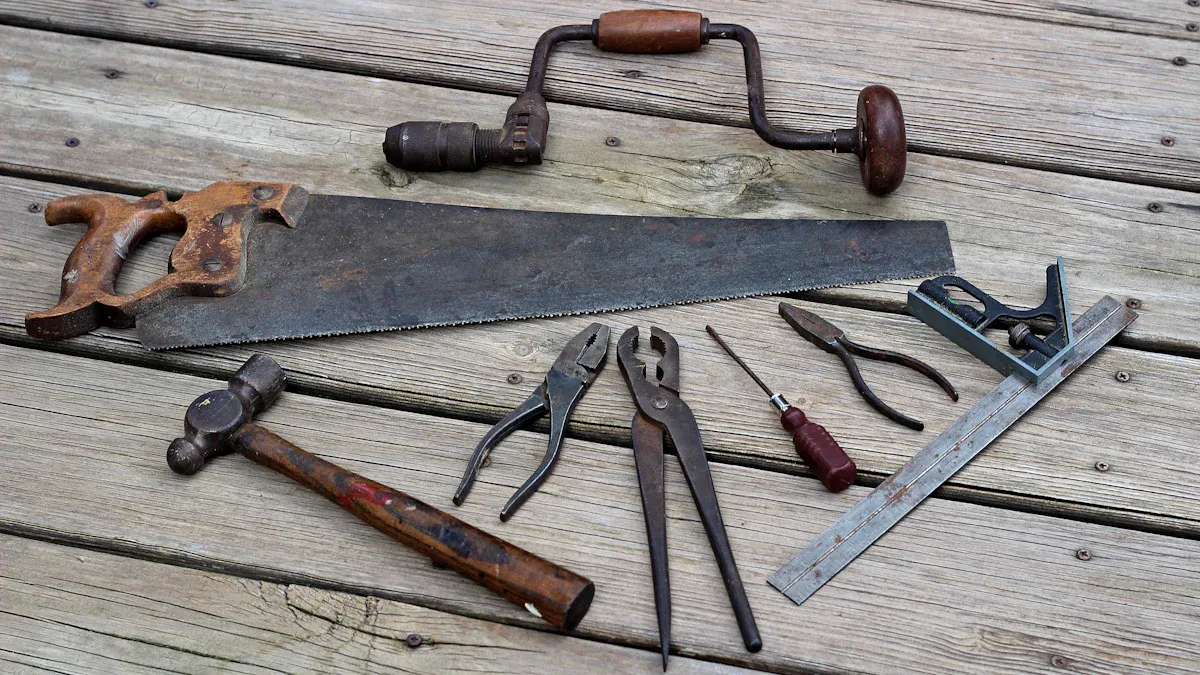
Woodwork Hand Tools for Beginners
Reliable cutting tools are the heart of woodworking. You need them for shaping, joinery, and almost every project you tackle. When you choose the right woodwork hand tools, you set yourself up for clean cuts, tight joints, and a smoother learning curve. Let’s break down three of the most important woodworking hand tools for beginners: hand saws, chisels, and utility knives.
Hand Saw
A hand saw is one of the most classic woodwork hand tools you’ll ever use. Even if you have power tools, you’ll reach for a hand saw when you want control, quiet, and precision. Hand saws let you cut boards to size, shape joints, and handle tasks that power tools can’t do as neatly.
Types
You’ll find several types of hand saws, each with its own specialty:
Japanese Ryoba Saw: This saw is a favorite for beginners. It has two edges—one for rip cuts (with the grain) and one for crosscuts (across the grain). You get versatility and value in one tool.
Western-Style Panel Saw: If you prefer a traditional feel, start with a crosscut panel saw. Add a rip saw later for more options.
Backsaws (like Dozuki or Dovetail Saws): These saws have stiff spines for extra control. They’re perfect for fine joinery and clean, precise cuts.
Coping and Flush Trim Saws: These are handy for special tasks, but you don’t need them right away.
Tip: Start with a Ryoba or a good crosscut saw. You’ll cover most beginner projects with just one or two saws.
Hand saws are essential tools for shaping wood and making joinery cuts. They give you the accuracy and control you need for clean results. You’ll find that a sharp, comfortable saw makes every project easier.
Care
Taking care of your hand saw keeps it sharp and safe. Here’s how you can do it:
Wipe the blade after each use to prevent rust.
Store your saw in a dry place, away from moisture.
Check the handle for cracks or loose screws.
Sharpen the teeth when you notice the saw dragging or binding.
Use a saw set to keep the teeth aligned.
A well-maintained saw lasts for years and gives you smoother, safer cuts. Never force a dull saw through wood. It’s harder on your arms and can lead to accidents.
Chisels
Chisels are some of the most versatile woodworking hand tools you’ll own. You use them for shaping, carving, paring, and mortising wood. Chisels help you fine-tune joinery, clean up corners, and create details that make your work stand out.
Sizes
You don’t need a huge set of chisels to get started. Most beginners do well with just a few sizes:
1/4" Chisel: Great for cleaning out dovetails and tight spaces.
1/2" Chisel: The most versatile. Use it for trimming tenons, cleaning mortises, and general tasks.
1" or 1-1/2" Chisel: Best for paring and removing larger waste.
Some woodworkers like a 3/8" chisel for dovetail work. Focus on quality over quantity. A small set of sharp chisels covers most beginner needs.
Note: Chisels come in different shapes, like bevel-edge or mortise chisels. Start with bevel-edge chisels for general use.
Sharpening
Sharp chisels are safer and work better. Here’s a simple sharpening routine for beginners:
Gather sharpening stones (coarse, medium, and fine grits), a flat plate, and a leather strop.
Flatten the back of the chisel until it’s perfectly smooth.
Use a sharpening guide to keep a steady angle on the bevel.
Start with coarse grit to shape the edge, then move to finer grits for polishing.
Raise a burr along the edge to check your progress.
Finish with a strop to polish and remove the burr.
Test sharpness by slicing end-grain wood with hand pressure.
Patience pays off. Practice your sharpening skills, and your chisels will reward you with clean, precise cuts. Avoid power grinders for final honing. They can overheat and damage the edge.
Utility Knife
A utility knife is a handy addition to your woodwork hand tools collection. You’ll use it for general cutting tasks, like trimming wood fibers, opening packages, or cutting rope. While it’s not as precise as a marking knife, it’s still useful for many jobs around the shop.
Uses
A utility knife has a double-beveled blade, so it’s not ideal for marking joinery lines. For layout work, a marking knife gives you cleaner, more accurate results. Still, a utility knife is great for quick, rough cuts and general shop tasks.
Safety
Safety matters every time you pick up a utility knife. Here’s how you can protect yourself:
Always use sharp blades. Dull blades slip and cause accidents.
Wear safety glasses to protect your eyes from flying chips.
Keep your fingers away from the cutting path.
Avoid breakaway utility knives. The blades can snap and cause injuries.
Choose a knife with a secure, comfortable handle for better control.
Stay focused and avoid distractions while cutting.
Wear fitted clothing to prevent snags.
Never use a utility knife if you feel tired or distracted.
Alert: Never use a utility knife for marking joinery lines. The double bevel can cause small errors. Stick to a marking knife for precision work.
By choosing the right woodwork hand tools and learning how to use them safely, you build a strong foundation for every project. Take care of your tools, keep them sharp, and always put safety first. You’ll find that these essential tools help you work smarter, faster, and with more confidence.
Shaping and Smoothing Tools
![Shaping and Smoothing Tools]()
When you want your woodworking projects to look sharp and professional, shaping and smoothing tools make all the difference. These tools help you create clean surfaces, tight joints, and crisp edges. If you want your finishing work to stand out, you need to master these basic woodworking tools early on.
A sharp tool is faster, more accurate, and safer than a dull one. When you use a block plane or a sharpening stone, you remove rough spots and create a smooth edge. This edge slices through wood easily, reduces tear-out, and gives you more control. You will notice that your finishing steps become much easier when your tools are sharp and well-tuned. Keeping your tools sharp also helps them last longer and makes your work more enjoyable.
Block Plane
Uses
A block plane is one of the most useful basic woodworking tools for shaping and smoothing wood. You can use it to trim end grain, chamfer edges, and fine-tune joinery. It fits in one hand, so you can use it for quick touch-ups or detailed finishing work. Many woodworkers reach for a block plane when they want to smooth a surface before applying a finish or when they need to adjust a joint for a perfect fit.
You will find that a block plane is great for cleaning up saw marks, leveling uneven spots, and making your finishing process smoother. Its small size and low blade angle make it perfect for slicing through tough end grain, which is often the trickiest part of finishing a project.
Adjustment
To get the best results from your block plane, you need to set it up properly. The most important step is sharpening the blade until it is razor sharp. No plane works well with a dull blade. Make sure the sole is flat and the iron is solidly bedded to avoid chatter. If your block plane has an adjustable mouth, set the gap smaller for fine shavings and harder woods. Open it up for heavier cuts.
Look for a block plane with a depth adjuster, a comfortable grip, and a quality lever cap. These features make it easier for you to control the blade and get smooth, even shavings. A low-angle block plane (about 12°) works best for end grain and finishing tasks. Always check that the blade is positioned bevel-up and sharpened to a 25-30° angle.
Tip: Tune your block plane before every project. A sharp, well-adjusted plane makes your finishing work faster and more precise.
Sharpening Tools
Types
You need sharpening tools to keep your basic woodworking tools in top shape. Here are some beginner-friendly options:
Honing guides help you keep a steady angle while sharpening.
Waterstones and oilstones work well for sharpening chisels, planes, and knives.
Diamond stones and abrasive papers are easy to use and last a long time.
For saws, files and sawsets help you keep the teeth sharp and set correctly.
Waterstones use water as a lubricant, while oilstones use oil. Both come in different grits, so you can start coarse and move to fine for a polished edge. Regular sharpening keeps your tools ready for any finishing job.
Maintenance
Learning to sharpen your tools is one of the most important skills in woodworking. Start by flattening the back of your edge tools with a stone or sandpaper. Next, grind the bevel to the right angle. Hone the edge with finer stones until it is razor sharp. You can finish by stropping the edge on leather for extra sharpness.
Here’s a simple sharpening routine for beginners:
Flatten the back of the tool.
Set the bevel angle with a grinder or sharpening system.
Hone the edge with finer stones.
Strop the edge for a polished finish.
For saws, use files and sawsets to keep the teeth sharp.
Practice sharpening by hand. Focus on controlled, consistent strokes. Pay attention to how the tool feels on the wood. You will soon know when it needs sharpening. Make sharpening a regular part of your finishing routine. Slow down and check your progress every few strokes. With practice, you will keep your basic woodworking tools sharp and ready for any project.
Note: Sharp tools make your finishing work easier, safer, and more enjoyable. Treat sharpening as a daily habit, not just an occasional chore.
Assembly and Joinery Tools
![Assembly and Joinery Tools]()
When you start putting your woodworking projects together, you need the right assembly and joinery tools. These tools help you hold, join, and secure wood pieces so your work stays strong and looks great. Let’s look at three essentials: mallets, clamps, and screwdrivers.
These tools make assembly easier and help you avoid mistakes that can ruin your hard work.
Mallet
Uses
A mallet is a must-have for beginners. You use it to tap joints together, drive chisels, and assemble pieces without damaging the wood. Unlike a metal hammer, a mallet has a softer, wider head. This design spreads out the force, so you don’t leave dents or marks on your project. You’ll find mallets made from hardwoods like maple or beech for strong strikes, and softer woods for delicate work. Some even have rubber heads for gentle tapping.
Mallets help you fit joints tightly.
They protect your chisels and wood from damage.
You can control the force, making them perfect for learning new skills.
Care
Keep your mallet clean and dry. Wipe off glue or dust after each use. Store it in a cool, dry place to prevent the wood from cracking. If the handle feels loose, tighten it or add a drop of wood glue. A well-cared-for mallet will last for years and make your woodworking more enjoyable.
Clamps
Types
Clamps hold your wood pieces together while glue dries or during assembly. You don’t need every type, but a few versatile clamps will cover most beginner projects. Here’s a quick guide:
| Clamp Type | Description & Use Case |
| Pipe Clamps | Adjustable width, strong pressure, great for large glue-ups and panels. |
| Bar Clamps | F-shaped, good for smaller pieces, quick release options available. |
| F-style Clamps | Universal, affordable, and great for boards or panels. |
| Quick Grip Clamps | One-handed use, fast action, best for light to medium duty clamping. |
| Spring Clamps | Handy for quick holds, limited pressure, good for small pieces. |
| Strap/Band Clamps | Wrap around odd shapes, perfect for boxes or frames. |
Tip: Start with a few F-style or quick grip clamps. Add pipe clamps as your projects get bigger.
Tips
Always use protective pads between the clamp and your wood to avoid marks. Don’t overtighten—just enough pressure to hold things steady. Arrange your clamps so the pressure is even. For most glue-ups, you’ll want at least two or three clamps. As you gain experience, you’ll learn which types work best for your favorite projects.
Screwdrivers
Types
Screwdrivers are essential hand tools for joining wood with screws. You’ll use them for assembling furniture, attaching hardware, and making repairs. Here are the main types you’ll need:
| Screwdriver Type | Description | Woodworking Application |
| Flathead (Slotted) | Straight slot tip | Basic woodworking screws and hardware |
| Phillips | Cross-shaped tip | Most common for woodworking and furniture |
| Robertson (Square) | Square tip, tight fit, less slippage | Secure fastening, popular in carpentry |
| Hex (Allen) | Hexagonal tip, fits hex socket screws | Furniture assembly, machinery, strong fastening |
Uses
You’ll use screwdrivers to drive screws, attach hinges, and secure joints. For most beginner projects, a Phillips and a flathead will get you started. If you build furniture kits, you’ll often need a Robertson or hex driver. Choose screwdrivers with comfortable handles and strong tips. Magnetic tips can make your work easier, especially when working in tight spots.
Note: Start with a small set of quality screwdrivers. You can always add more as your skills grow.
Assembly and joinery tools help you bring your woodworking projects together. With a mallet, a few clamps, and the right screwdrivers, you’ll have the confidence to tackle new builds and repairs. These hand tools give beginners the control and precision needed for strong, lasting results.
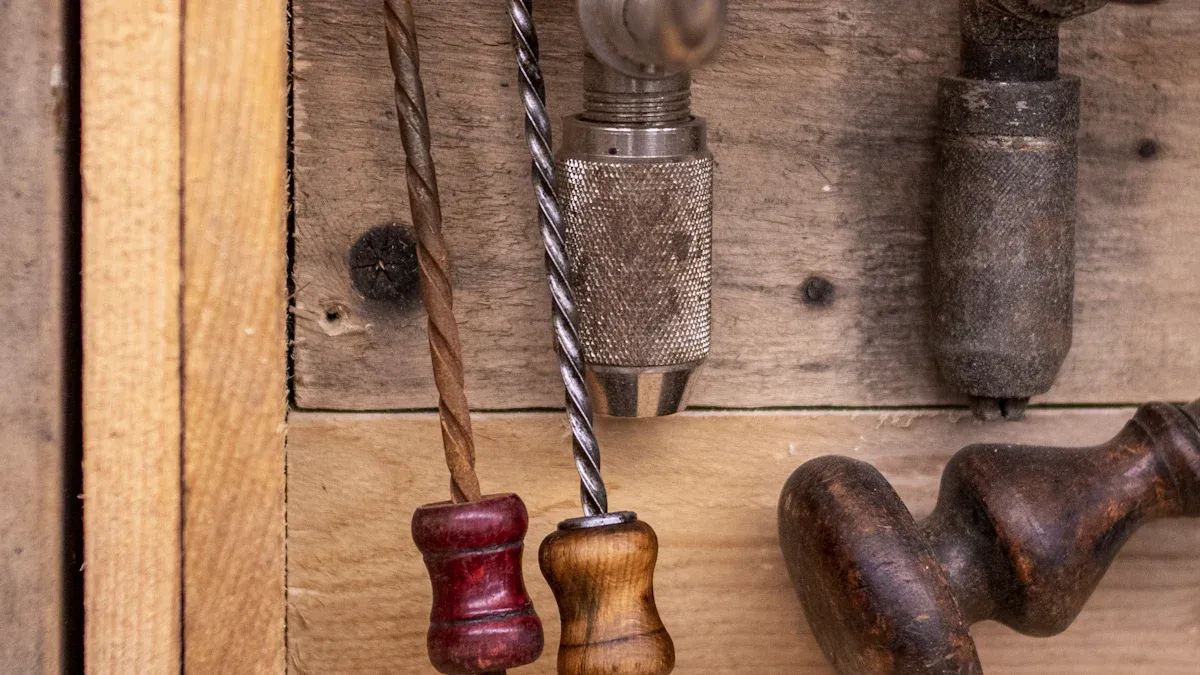
Boring and Holding Tools for Beginner Woodworkers
When you start woodworking, you quickly realize that making clean holes and having a stable workspace are game changers. Boring tools, like hand drills or braces, help you create precise holes for joinery, hardware, and dowels. A sturdy workbench keeps your projects steady and safe while you work. Both are must-haves for beginner woodworkers.
Hand Drill or Brace
Uses
You’ll use a hand drill or brace for drilling holes in wood. These tools give you more control than power drills, especially when you need to drill at an angle or in a tight spot. Hand drills and braces help you keep the bit straight, so your holes come out clean and accurate. Many beginner woodworkers find that braces, in particular, make it easier to avoid mistakes like bit wandering or cam-out.
Here’s why these tools stand out:
You get better control and accuracy, which is great for joinery.
Braces with sharp auger bits clear chips fast, sometimes as quickly as a power drill.
You don’t need batteries or electricity, so you can work anywhere.
The slower speed and tactile feedback help you feel the wood and adjust as needed.
Braces often create cleaner holes, thanks to the way the bit scribes before cutting.
Traditional braces can bore holes from 1/4" up to 1-1/2", making them perfect for larger joinery. Many beginners like using secondhand Stanley braces because they’re affordable and reliable.
Tips
If you’re new to hand drills or braces, start with a model that feels comfortable in your hand. Ratchet braces are handy for working in tight spaces. Look for spiral auger bits with screw tips—they pull themselves into the wood, making drilling easier and safer. Remember to keep your bits sharp for the best results.
Tip: Practice on scrap wood first. This helps you get a feel for the tool and improves your accuracy before you tackle your main project.
Workbench
Features
A solid workbench is the heart of any woodworking shop. For beginner woodworkers, stability and sturdiness matter most. Look for a bench with a thick top—about 3 to 4 inches is ideal. This gives your bench the mass it needs to stay put while you work. Solid hardwood tops, like maple or beech, last longer and resist dents.
Key features to look for:
Sturdy construction with strong joinery
A level, flat surface for accurate work
Built-in vises or clamps for holding your wood securely
Legs that are flush with the top, making it easier to plane large boards
Comfortable height to reduce fatigue during long sessions
Optional features, like storage shelves or pegboards, help keep your tools organized and within reach.
Setup
Set up your workbench in a spot with good lighting and enough space to move around. Make sure the bench sits flat on the floor—no wobbling allowed! Adjust the height so you can work comfortably without bending over. Keep your bench clean and oil any moving parts, like vises, to make sure everything works smoothly.
Note: A stable workbench not only keeps your projects steady but also helps you work safer and more efficiently.
With the right boring tools and a solid workbench, you’ll find woodworking more enjoyable and your results more professional. These basics set you up for success as you grow your skills.
Starting with a small set of essential tools helps beginners build skills and confidence. You avoid feeling overwhelmed and focus on learning the basics safely. Here’s why this approach works:
You master measuring, cutting, and joinery before adding more tools.
Quality tools last longer and make each project easier.
Practicing safety and regular maintenance keeps you working without accidents.
Ready to share your favorite beginner tools or tips? Drop your thoughts in the comments!
FAQ
What is the first woodworking hand tool I should buy?
Start with a tape measure. You need accurate measurements for every project. A good tape measure helps you avoid mistakes and wasted wood. It’s the tool you’ll reach for most often.
How do I keep my hand tools sharp?
Sharpen your tools regularly with sharpening stones or diamond plates. Use a honing guide for steady angles. Sharp tools work better and keep you safer. Practice sharpening on scrap tools before working on your favorites.
Do I need expensive tools to get started?
No, you don’t. Many affordable brands offer great quality for beginners. Focus on a few reliable tools. Upgrade as your skills grow. Quality matters more than price, but you don’t need to break the bank.
How do I store my woodworking hand tools?
Keep your tools dry and organized. Use a toolbox, wall rack, or drawer. Wipe tools after use to prevent rust. Store sharp tools with blade covers. Good storage keeps your tools safe and ready.
What’s the difference between a marking knife and a utility knife?
A marking knife makes thin, precise lines for joinery. It scores the wood fibers. A utility knife cuts general materials but leaves wider marks. For accuracy, use a marking knife when laying out joints.
How many clamps do I really need?
Start with two or three F-style or quick grip clamps. Add more as your projects get bigger. You’ll find that clamps are like extra hands in the shop. You can never have too many!
Can I use a regular hammer instead of a mallet?
You shouldn’t. A mallet spreads force and protects your wood and chisels. A hammer can dent wood and damage your tools. Invest in a wooden or rubber mallet for better results.
What’s the best way to learn safe tool use?
Read tool manuals and watch beginner videos. Practice on scrap wood. Always wear safety gear. Take your time and focus on technique. Ask experienced woodworkers for tips. Safety comes first in every project.