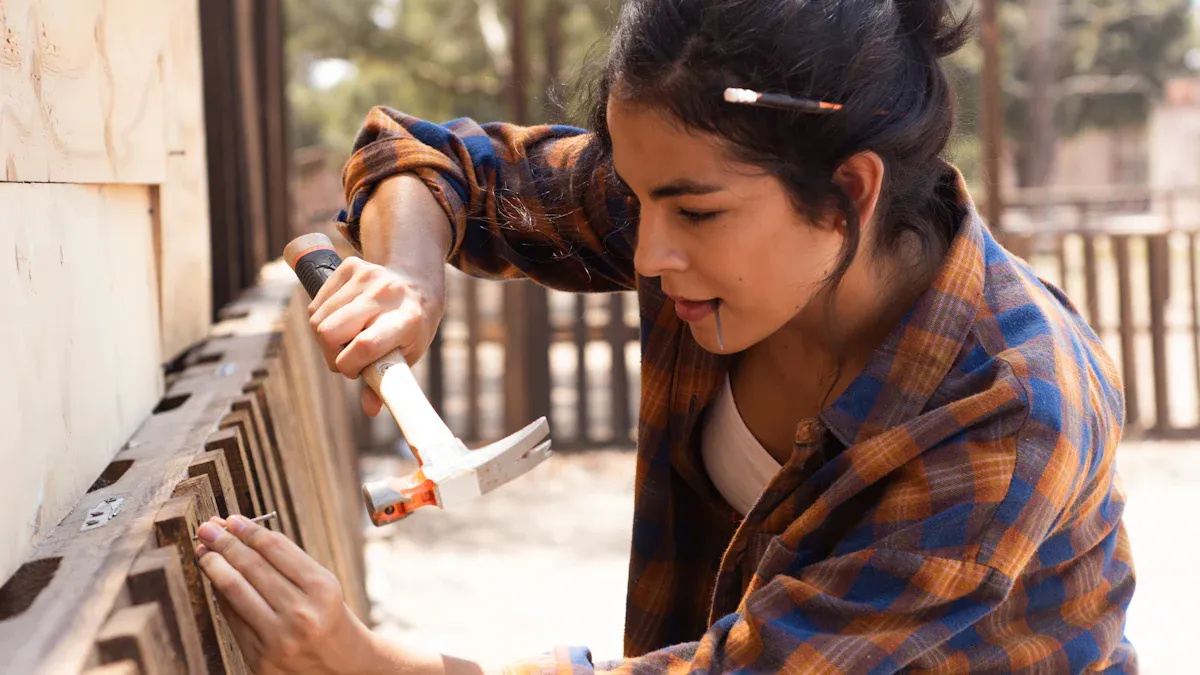
When you start fixing a fence, having the right fence repair tools makes every step easier and safer. Industry experts recommend these essentials for beginners:
Hammer
Screwdriver set (flathead and Phillips)
Pliers
Tape measure
Level
Cordless drill
Circular saw
Post hole digger
Wire cutters
Work gloves and safety glasses
Knowing how to use each tool helps you work quickly and avoid accidents. With these fence repair tools, you can handle most basic repairs and keep your fence strong for years.
Fence Repair Tools Overview
When you start any fence repair project, you need to know which tools to use and how they help. Fence repair tools fall into several main categories: basic hand tools, power tools, specialized tools, and safety gear. Each category serves a unique purpose and fits different types of fencing, such as wood fencing, vinyl fencing, and chain link fencing. The right tools make your repairs faster, safer, and more durable.
Basic Hand Tools
These tools form the foundation of any fence repair kit. You will use them for almost every type of fence, from wood to wire and vinyl.
Hammer
You use a hammer to drive or remove nails, especially when working with wood fencing. A claw hammer also helps pry out old nails or boards. For most repairs, this tool is a must-have for fence contractors and homeowners alike.
Screwdriver
A screwdriver lets you install or remove screws and hardware. Both flathead and Phillips screwdrivers are useful. You will need them for wood and vinyl fencing, where screws hold panels, rails, or brackets in place.
Pliers
Pliers help you grip, twist, and pull wires or nails. They are essential for chain link fencing and barbed wire repairs. You can also use them to bend or cut wire, making them versatile for many fence types.
Adjustable Wrench
An adjustable wrench allows you to tighten or loosen bolts and nuts. You will find it handy when working with metal posts or hardware on chain link fencing and some vinyl fencing systems.
Tape Measure
A tape measure ensures you cut boards and place posts at the correct length and spacing. Accurate measurements keep your fence straight and sturdy.
Tip: Always double-check your measurements before cutting or drilling. This habit saves time and materials.
Power Tools
Power tools speed up your work and help you handle tougher materials. They are especially useful for larger repairs or new installations.
Drill
A cordless drill makes it easy to drive screws and drill holes in wood or vinyl fencing. You can switch between drill bits and screwdriver bits for different tasks. This tool saves time compared to manual screwdrivers.
Circular Saw
A circular saw cuts wood boards quickly and cleanly. You will use it for wood fencing repairs, such as replacing damaged pickets or rails. It provides straight, precise cuts that hand saws cannot match.
Reciprocating Saw
A reciprocating saw cuts through metal posts, brackets, or thick wood. It works well for chain link fencing and for removing old or damaged fence sections. This tool handles tough jobs that would take much longer with a manual saw.
Tool Category | Examples | Main Uses |
Basic Hand Tools | Hammer, screwdriver, pliers | Fastening, removing, gripping, measuring |
Power Tools | Drill, circular saw, reciprocating saw | Drilling, cutting wood/metal, quick repairs |
Specialized Tools | Fence pliers, post hole digger | Cutting wire, digging, tensioning, compacting |
Specialized Tools
Specialized fence repair tools help you tackle specific tasks that basic tools cannot handle. These tools are often must-haves for fence contractors who work with different fence types.
Post Hole Digger
You use a post hole digger to dig uniform holes for new or replacement fence posts. This tool works for all fence types, including wood, vinyl, and chain link fencing.
Auger
An auger, either manual or powered, drills deep, round holes in the ground. It makes post installation faster and easier, especially in tough soil.
Shovel
A shovel helps you dig, clear debris, and level the ground around fence posts. You need it for preparing the site and backfilling holes.
Tamper
A tamper compacts soil around fence posts. Proper tamping keeps posts stable and prevents leaning over time.
Manual Post Driver
You use a manual post driver to pound metal or wooden posts into the ground. It is especially useful for wire and chain link fencing.
Fence Pliers
Fence pliers combine several functions: cutting wire, hammering staples, removing staples, and twisting wire. You will find them essential for wire and barbed wire fences. Their multi-function design saves you time and effort.
Wire Cutters
Wire cutters let you cut through wire fencing, chain link, or barbed wire. They provide clean cuts and help you remove damaged sections quickly.
Wire Crimping Tool
A wire crimping tool secures wire connections, especially on electric or barbed wire fences. Some models also cut wire, making them versatile for installation and repair.
Barbed Wire Stretcher
A barbed wire stretcher pulls wire tight and keeps it secure. Proper tension prevents sagging and increases fence durability.
Clamshell Digger
A clamshell digger works like a post hole digger but has two hinged blades. You use it to dig deep, narrow holes for posts.
Level
A level ensures your posts and rails stay straight and even. This tool is vital for a professional-looking fence.
Note: Specialized tools like fence pliers and wire crimpers are designed for specific tasks. Using the right tool prevents damage and improves your results.
Safety Gear
Safety gear protects you from injuries while using fence repair tools. Never skip these items, especially when working with power tools or sharp wire.
Gloves
Work gloves shield your hands from splinters, sharp edges, and blisters. Choose gloves with a good grip for handling tools and materials.
Safety Glasses
Safety glasses protect your eyes from flying debris, dust, and wire fragments. Always wear them when cutting, drilling, or hammering.
Hearing Protection
Hearing protection, such as earplugs or earmuffs, reduces noise from power tools. Prolonged exposure to loud sounds can damage your hearing.
Remember: Safety gear is just as important as any tool in your kit. Protect yourself so you can finish your project without injury.
Safety Gear
Staying safe during fence repair should always be your top priority. The right safety gear protects you from common injuries and helps you work with confidence. You face sharp edges, flying debris, and loud noises when you repair fences. Each piece of safety gear serves a specific purpose and keeps you out of harm’s way.
Gloves
You need gloves for every fence repair job. Gloves protect your hands from splinters, cuts, and rough materials. They also shield you from sharp edges and flying debris. Choose gloves with a good grip so you can handle tools and materials securely.
Prevent splinters from wood fencing
Block cuts from wire or metal edges
Reduce blisters from using hand tools
Improve grip on slippery or muddy surfaces
Tip: Select heavy-duty gloves for wire or metal fences. Use flexible gloves for detailed work with small parts.
Safety Glasses
Your eyes are vulnerable during fence repairs. Safety glasses or goggles shield your eyes from dust, flying debris, and metal shards. Even a small piece of wood or wire can cause serious injury if it hits your eye.
Protect against flying debris when cutting or hammering
Block dust and small particles from entering your eyes
Prevent injuries from sharp objects or wire fragments
Note: Always wear safety glasses when you use power tools or work with wire fencing.
Hearing Protection
Power tools like drills and saws create loud noises that can damage your hearing. You should use earplugs or earmuffs to protect your ears during these tasks. Prolonged exposure to loud sounds can lead to permanent hearing loss.
Reduce noise from drills, saws, and other power tools
Prevent hearing damage during long repair sessions
Safety Reminder: Keep hearing protection in your tool kit. Use it every time you operate loud equipment.
Other Recommended Safety Gear:
Slip-resistant footwear for stability on uneven ground
Long-sleeved clothing to prevent scratches and minor injuries
Hard hats and steel-toed boots for extra protection during fence removal
Wearing the right safety gear helps you avoid cuts, eye injuries, hearing loss, and other accidents. Make safety your habit every time you repair a fence.
Fencing Tools List by Purpose
When you approach a fence repair project, you need to match each tool to its main job. This fencing tools list organizes the most important tools by their primary purpose. Using the right tool for each task helps you work faster and achieve better results.
Primary Purpose Category | Description | Example Tools |
Digging and Post Hole Tools | Dig holes and prepare ground for fence posts | Post Hole Digger, Auger, Shovel, Tamper, Post Driver |
Cutting and Shaping Tools | Cut and shape fence materials | Saw, Wire Cutters |
Fastening and Securing Tools | Attach and secure fence components | Hammer, Screwdriver, Fence Staples, Wire Crimping Tool |
Digging and Setting Posts
You need strong, stable posts for any fence. The right tools make digging and setting posts much easier.
Post Hole Digger
A post hole digger lets you dig narrow, deep holes for fence posts. You grip the handles and scoop out soil, creating a hole with straight sides. This tool works well for small projects and tight spaces. It gives you control over the hole size and depth.
Auger
An auger drills holes quickly and with less effort. Powered augers save time on large projects and tough soil. You get uniform holes, which helps keep your fence straight. Manual augers work for smaller jobs. Powered models suit bigger projects or hard ground.
Shovel
A shovel helps you move soil, clear debris, and backfill holes. You use it to shape the area around posts and make sure the ground is level. Every fencing tools list should include a sturdy shovel.
Tamper
A tamper compacts soil around the base of each post. You press down firmly to remove air pockets and stabilize the post. This step prevents leaning and keeps your fence strong.
Manual Post Driver
A manual post driver pounds posts into the ground. You lift and drop the heavy tool over the post, driving it deep for stability. This tool is essential for metal or wooden posts, especially in wire fencing.
Tip: Use an auger for speed and uniform holes. Choose a post hole digger for more control in tight spots.
Cutting and Shaping
You often need to cut boards or wire to fit your fence. The right cutting tools make this job safe and precise.
Saw
A saw cuts wood fencing boards, rails, or posts. Circular saws work best for straight cuts. Reciprocating saws handle demolition or cutting through metal. Choose the right blade for the material you need to cut.
Wire Cutters
Wire cutters snip through wire fencing, chain link, or barbed wire. You get clean cuts and can remove damaged sections easily. Always use sharp cutters for the best results.
For wood fencing, use a saw with a sharp blade to get smooth, accurate cuts.
Fastening and Securing
You must attach boards, rails, and wire securely to build a strong fence. These tools help you fasten and secure every part.
Hammer
A hammer drives nails and fence staples into wood. You also use it to remove old nails or tap boards into place. Choose a claw hammer for extra versatility.
Screwdriver
A screwdriver installs or removes screws in fence panels and hardware. Use both flathead and Phillips screwdrivers for different types of screws. Screws hold better than nails and make repairs easier.
Fence Staples
Fence staples secure wire fencing to wooden posts. You hammer them in to keep wire tight and in place. Use galvanized staples for outdoor durability.
Wire Crimping Tool
A wire crimping tool joins and secures wire ends. You use it for electric or barbed wire fences. Crimped connections stay tight and resist pulling apart.
Screws provide stronger holding power than nails. They are less likely to loosen over time and make future repairs simpler.
Measuring and Leveling
Accurate measurements and level installations make your fence look professional and last longer. You need the right tools to measure distances and keep everything straight. These tools help you avoid crooked posts and uneven panels.
Tape Measure
A tape measure is one of the most important tools in your fencing tools list. You use it to measure the distance between posts, the height of pickets, and the length of rails. Heavy-duty tape measures work best for outdoor projects because they resist bending and stand up to rough use.
Many professionals also use advanced tools to improve accuracy and speed. For example, Equalizer and Equalizer Mini tools let you stretch a cord between posts, so you do not have to make complex calculations. Buddy Picket ensures you keep picket heights consistent. Shadowlizer and Straightaway help you align boards and space them evenly. The Adjuster makes leveling adjustments quick and easy.
Heavy-duty tape measure: Measures distances and post spacing.
Equalizer/Equalizer Mini: Ensures even post spacing.
Buddy Picket: Keeps picket heights uniform.
Shadowlizer/Straightaway: Aligns boards and spaces them accurately.
Adjuster: Helps with quick leveling.
Tip: Always double-check your measurements before you cut or install any fence part. This habit saves time and prevents mistakes.
Level
A level helps you keep posts, rails, and panels straight and even. Spirit levels are the most common type. You place the level on top of a post or rail and adjust until the bubble sits in the center. This step ensures your fence does not lean or sag.
Specialized tools like the Adjuster and Equalizer also help you level and align fence panels quickly. These tools improve the durability and appearance of your fence by making sure every part lines up perfectly.
Tool Name | Main Use |
Spirit Level | Checks if posts and rails are straight |
Adjuster | Quick leveling and adjustments |
Equalizer | Aligns and spaces posts evenly |
Using accurate measuring and leveling tools reduces installation time and gives your fence a professional finish.
Safety Equipment
You must protect yourself when you repair or install a fence. Safety equipment keeps you safe from injuries caused by sharp tools, flying debris, and heavy materials. Always wear the right gear before you start any project.
Gloves
Gloves protect your hands from cuts, splinters, and blisters. Choose gloves that fit well and give you a good grip. Heavy-duty gloves work best for handling wire or metal. Flexible gloves help when you need to work with small parts.
Prevents cuts and scrapes from sharp edges
Reduces blisters from using hand tools
Improves grip on wet or muddy surfaces
Safety Glasses
Safety glasses shield your eyes from dust, wood chips, and metal fragments. Even a small piece of debris can cause serious eye injuries. Always wear safety glasses when you cut, drill, or hammer.
Other common safety equipment includes hard hats and personal protective equipment (PPE). These items protect you from high-impact collisions and harmful chemicals. Following OSHA guidelines helps you stay safe. OSHA recommends using proper lighting, barricading work areas, and wearing protective gear to reduce accident risks. Wearing the right safety equipment prevents injuries like cuts, punctures, and respiratory problems.
Remember: Safety gear is not optional. It keeps you safe and helps you work with confidence.
Common Fence Repair Problems
Fence issues can happen to anyone, especially after storms, heavy winds, or years of wear. You can solve most common problems with the right tools and a step-by-step approach. Here are three of the most frequent fence repair challenges and how you can tackle them.
Loose Boards
Loose or missing boards are a common problem for wooden fences. Weather, age, and impact can loosen nails or screws, making boards rattle or fall off. If you ignore loose boards, your fence can become unstable and lose its appearance.
Tools You Need:
Hammer (for nails)
Drill or screwdriver (for screws)
Pry bar (to remove damaged boards)
Measuring tape
Level
Saw (for cutting replacement boards)
Galvanized nails or exterior screws
Safety gear: gloves, goggles, sturdy shoes
How to Repair Loose Boards:
Inspect the fence and identify all loose or damaged boards.
Use a pry bar to gently remove any boards that cannot be fixed.
Measure the gap and cut a new board to size with a saw.
Hold the new or loose board in place. Use a level to check alignment.
Secure the board with galvanized nails or exterior screws. A drill makes this step faster and helps prevent wood from splitting.
Double-check that the board sits flush and straight.
Tip: Always wear gloves and goggles when repairing a fence. Splinters and flying debris can cause injuries.
Loose boards often result from weather exposure or poor fasteners. Use pressure-treated lumber for replacements to prevent future rot. Regularly check your fence for loose panels to catch problems early.
Leaning Posts
A leaning post can make your entire fence unstable. Soil erosion, water damage, or a damaged fence post often cause this issue. If you do not fix a leaning post, the problem can spread to other sections.
Essential Tools:
Shovel
Level
Crowbar or jack
Wooden stakes or two-by-fours (for bracing)
Fast-setting concrete or gravel
Saw, pliers, screwdriver
Protective coatings (for wood)
Gloves and safety goggles
How to Brace a Fence Post and Straighten It:
Check the post for rot, cracks, or insect damage. Replace a damaged fence post if needed.
Dig around the base of the leaning post with a shovel, at least 12 inches deep.
Use a level to straighten the post. Apply force with a crowbar or jack if the post is stubborn.
Brace the post with wooden stakes or two-by-fours to keep it upright.
Fill the hole with fast-setting concrete for a permanent fix, or use gravel if you want a removable option. Let concrete cure for at least 24 hours.
Recheck the alignment with a level. Remove the braces once the post is secure.
Apply a weatherproof sealant or termite-resistant treatment to protect wooden posts.
Note: Set posts at least 2 feet deep for stability. Regular maintenance helps prevent leaning in the future.
Leaning posts often signal deeper issues like erosion or poor installation. When you repair leaning posts, you strengthen the entire fence and prevent bigger problems.
Sagging Gates
Sagging gates make it hard to open and close your fence. This problem usually happens when hinges loosen, posts shift, or the gate frame weakens. If you do not repair fence gates quickly, the gate can drag on the ground or break.
Tools and Materials:
Power drill or impact driver
Level
Tape measure
Screwdrivers and wrenches
Corner braces or brackets
Turnbuckle and steel cable (for anti-sag kits)
New hinges or latch (if needed)
Two-by-four lumber (for bracing)
Circular saw (for cutting braces)
Shovel or post hole digger (if post repair is needed)
Safety gear: gloves, goggles
Steps to Repair a Sagging Gate:
Inspect the gate, hinges, and posts for damage or misalignment.
Remove the gate by unscrewing the hinges and lifting it off.
Check and repair the gate post. Dig around it, straighten with a level, and reset with concrete if needed.
Realign the gate. Use a two-by-four as a lever to lift the gate until it sits level.
Attach corner braces or a diagonal support to the gate frame using a drill and screws.
Install a turnbuckle and steel cable from the lower hinge side to the upper latch side. Tighten the turnbuckle to add tension and keep the gate straight.
Reattach the gate to the post. Test by opening and closing to ensure smooth movement.
Replace worn hinges or latches if necessary.
Pro Tip: Paint or seal the gate after repairs to protect it from weather and extend its life.
Sagging gates often result from shifting posts or worn hardware. When you repair a sagging gate, you restore both function and security to your fence.
Broken Wire
Broken wire is a common issue in wire and chain link fences. You might notice sagging sections or gaps where animals or weather have snapped the wire. Quick action prevents further damage and keeps your fence secure.
Essential Tools for Repairing Broken Wire:
Fence stretcher or ratchet-type wire stretcher: applies tension and keeps the wire taut
Fencing sleeves (crimp sleeves) and splicing tools: connect two pieces of wire securely
Heavy-duty pliers or fence wire pliers: crimp sleeves and handle wire
Wire grips and cable pullers: hold and pull wire tightly
Gloves: protect your hands from sharp wire ends
Tip: Always wear gloves when handling wire. Sharp ends can cause deep cuts.
How to Repair Broken Wire:
Inspect the fence to find all broken or loose wires.
Use wire grips or a cable puller to hold the wire ends.
Stretch the wire with a fence stretcher until it is taut.
Slide a fencing sleeve over the broken ends.
Use heavy-duty pliers or a splicing tool to crimp the sleeve tightly.
Check the tension and adjust if needed.
Trim any excess wire with wire cutters.
A properly stretched and spliced wire will restore strength to your fence. If you see multiple breaks, consider replacing the entire section for a long-lasting repair.
Rusty Hardware
Rusty hardware weakens your fence and can cause panels or gates to loosen. You should replace or restore rusted nails, screws, hinges, and brackets to keep your fence safe and looking good.
Tools and Materials for Replacing Rusty Hardware:
Wire brush or sandpaper: removes loose rust and old paint
Rust converter: transforms rust into a protective barrier
Metal primer and outdoor metal paint: seals and protects hardware
Galvanized nails or stainless steel screws: resist future rust
Hammer and cordless drill: remove and install hardware
Safety gear: gloves, safety glasses, and dust mask
Note: Always wear safety glasses and a dust mask when sanding or brushing rust.
Steps to Repair Rusty Hardware:
Remove old, rusty hardware with a hammer or drill.
Scrub the area with a wire brush or sandpaper to remove rust.
Apply rust converter and let it dry.
Sand the surface again for a smooth finish.
Prime and paint the hardware with outdoor metal paint.
Install new galvanized nails or stainless steel screws.
Tool/Material | Purpose |
Wire brush/sandpaper | Remove rust and old paint |
Rust converter | Protects metal from further rust |
Galvanized hardware | Prevents future rust |
Safety gear | Protects you during the process |
Replacing rusty hardware helps prevent future problems and extends the life of your fence. Choose high-quality, rust-resistant fasteners for the best results.
Rotting Wood
Rotting wood is a serious problem for wooden fences. Moisture, insects, and age can cause boards or posts to decay. You need to act quickly to repair rot and stop it from spreading.
Best Tools and Methods for Repairing Rotting Wood:
Safety glasses and gloves: protect you from splinters and dust
Saw and chisel: remove all decayed wood
Putty knife: apply wood filler or epoxy
Wood hardener: strengthens remaining wood fibers
Exterior-grade wood filler or epoxy: fills gaps and restores shape
Sandpaper: smooths the repaired area
Galvanized screws: secure new or repaired boards
Primer and paint: seal and protect the wood
Tip: Always assess the damage first. If you find a damaged fence post or severe rot, you may need to replace a damaged fence post or brace a fence post for stability.
How to Repair Rotting Wood:
Inspect the fence and mark all rotten areas.
Use a saw or chisel to remove decayed wood.
Apply wood hardener to strengthen the remaining wood.
Fill holes or gaps with exterior-grade wood filler using a putty knife.
Let the filler dry, then sand it smooth.
Reinforce weak spots with metal brackets or extra screws if needed.
Prime and paint the repaired area to seal out moisture.
For post tops, install a slanted cap to shed water. For rot near the ground, use a metal post mender or replace the post if the damage is severe. These steps will help you repair your fence and prevent future rot.
Step-by-Step Repair Guide
Assess Damage
Before repairing a fence, you need to understand exactly what is wrong. Start by walking along the entire fence line. Look for obvious problems like cracks, broken boards, leaning posts, or missing panels. Pay close attention to safety hazards such as splintered wood, exposed nails, or sharp metal edges. These can cause injuries if you are not careful.
Check the ground around each post. Soil erosion or waterlogged areas can make posts unstable. Sometimes, damage is not easy to spot. Watch for uneven fence lines, loose posts, or sections that sway when touched. Take clear photos of all damage. These photos help with insurance claims and make it easier to plan your repair.
Tip: Always remove debris and clear the area before you begin. If you find large obstructions, consider getting professional help.
Decide if the damage is limited to one area or if it affects the whole fence. If you see serious problems or feel unsure, you may want to consult a professional for a full evaluation. Safety should always come first. Fix hazards before you worry about how the fence looks.
Steps to Assess Damage:
Walk the fence line and look for visible damage.
Inspect for hazards like splinters or sharp edges.
Check soil stability around posts.
Look for hidden issues such as loose or swaying sections.
Take photos for records and insurance.
Remove debris and clear the area.
Decide if you need professional help.
Choose Tools
Once you know what needs fixing, you must select the right tools for the job. The type of fence and the kind of damage will guide your choices. For wood fences with minor issues, you might need a pry bar to remove damaged boards, a hammer or screwdriver for fastening, and wood filler for small holes. If you find rot, use a chisel or knife to test the wood and replace any weak sections.
For metal fences, use wire brushes to remove rust and wire cutters to replace broken links. Apply rust-inhibiting primer and weather-resistant paint to protect the metal. Vinyl fences with cracks require cleaning and a vinyl repair kit.
If you face severe problems like leaning posts or major panel replacements, you will need post hole diggers, concrete mix, and power saws. Sometimes, you may need to call a professional, especially for large or complex repairs.
Note: Always use safety equipment such as gloves and goggles, no matter what type of repair you are doing.
Common Tool Choices:
Basic hand tools: hammer, screwdrivers, pliers, wire cutters, level, tape measure
Power tools: drill, circular saw, reciprocating saw
Specialty tools: post hole digger, concrete mixing supplies, fence pullers
Gather Materials
After you choose your tools, gather all the materials you need before you start repairing a fence. This step saves time and helps you avoid interruptions. The materials you need depend on the type of fence and the repair required. For wood fences, collect lumber, nails, screws, wood preservatives, and paint. For metal fences, gather rust-resistant paint, replacement links, and fasteners. Vinyl fences may need repair kits and replacement pickets.
Always include safety gear such as gloves, goggles, slip-resistant shoes, and long sleeves. These items protect you from injuries during the repair process.
Efficient Gathering Tips:
Assess the damage first to know exactly what you need.
Make a checklist of tools and materials.
Gather everything before you begin to avoid delays.
Use the right tools for each material, such as a fence stapler for wire fencing or a trowel for concrete.
Reminder: Begin repairs only after you have all the necessary materials and tools. This approach makes the process smoother and more efficient.
Material/Tool | Use Case |
Lumber, nails, screws | Wood fence repairs |
Concrete mix, trowel | Setting or resetting posts |
Wire cutters, staples | Wire or chain-link repairs |
Repair kits | Vinyl fence fixes |
Safety gear | All repairs |
Regular inspection and seasonal maintenance help you spot problems early. This habit allows you to gather materials in advance and prevents bigger issues later. Whether you need to repair fence gates or replace a post, preparation is key to a successful repair.
Prepare Area
Before you start any fence repair, you need to prepare the area carefully. Good preparation helps you avoid mistakes, keeps you safe, and makes the repair process smoother. Follow these steps to get your worksite ready:
Walk Your Property
Begin by walking along your fence line. Look for obstacles such as rocks, tree roots, or uneven ground. Notice any slopes or drainage issues that might affect your repair.
Check Property Boundaries
If you are unsure where your property ends, get a professional survey. This step prevents disputes with neighbors and ensures you do not build or repair on someone else’s land.
Review Local Regulations
Contact your city or homeowners association to learn about fence rules. Some areas have limits on fence height, style, or placement. You may need a permit before you start your repair.
Communicate with Neighbors
Let your neighbors know about your plans. Good communication avoids misunderstandings and helps you work together if the fence sits on a shared boundary.
Locate Underground Utilities
Call 811 or your local utility service before you dig. They will mark underground lines so you do not hit gas, water, or electrical cables during your repair.
Clear the Fence Line
Remove rocks, debris, and old fence parts from the area. Trim back bushes and tree limbs that hang over the fence. This step gives you space to work and keeps the area safe.
Mark the Layout
Use stakes and string to mark the exact fence line. Mark where you need to repair posts or add gates. Double-check your measurements to avoid mistakes.
Plan for Drainage
Watch how water flows around your fence. If you see puddles or soggy spots, consider grading the land or adding drainage solutions. Good drainage protects your fence from rot and damage.
Tip: Preparing the area well saves you time and money during the repair. It also helps you avoid costly errors or accidents.
A well-prepared area makes every repair easier. You will work faster and safer, and your finished fence will last longer. Always take time to prepare before you begin any repair project.
Maintenance and Upkeep
Regular Inspections
You should inspect your fence and tools regularly to prevent major repairs and keep everything in top shape. Most experts recommend a seasonal (quarterly) inspection for all fences. Wooden fences need extra attention because they can rot or warp, so check them every three months. Metal fences usually require a check twice a year to spot rust or corrosion.
Follow this inspection routine to catch problems early:
Walk along your fence line each season.
Focus on post bases, joinery points, and the surface of the fence.
Test gate functionality and look for signs of pest infestation.
Use a level and tape measure to check for leaning posts or uneven panels.
Bring pliers, a hammer, and a screwdriver to tighten loose hardware.
Address small issues like loose nails or minor rust right away.
If you feel unsure about the condition, schedule a professional inspection for peace of mind.
Tip: Quick fixes during inspections, like tightening a screw or removing rust, help you avoid expensive repairs later.
Cleaning Tools
Clean tools last longer and work better. After each repair session, wipe down your tools to remove dirt, sap, or moisture. Use a wire brush for stubborn grime on metal tools. Dry everything thoroughly to prevent rust. Store your tools in a dry, organized space, such as a toolbox or shed.
For hand tools, use mild soap and water, then dry with a towel.
For power tools, follow the manufacturer’s cleaning instructions.
Oil moving parts like hinges or pliers to keep them smooth.
Inspect tool handles for cracks or splinters and repair them as needed.
A clean set of tools makes every repair easier and safer.
Seasonal Care
Your fence faces different challenges in each season. Adjust your maintenance routine to match the weather and climate in your area.
Spring:
Remove winter debris and check for loose boards or nails. Look for mold or mildew, especially in shaded spots. Apply a water-repellent sealant to protect against moisture and sun. Focus on ground-contact areas and make sure water drains away from posts.
Summer:
Protect wood from strong sunlight with UV-resistant sealants or stains. Trim plants near the fence to improve airflow and reduce moisture. Watch for insect activity, such as termites. Avoid spraying sprinklers directly on the fence.
Fall:
Clear away fallen leaves and organic debris to prevent moisture buildup. Trim overhanging branches to avoid storm damage. Tighten any loose parts and apply a fresh coat of sealant if needed. Lubricate hardware to prevent freezing.
Winter:
Remove snow buildup to reduce stress on the fence. Fix any storm or ice damage quickly. Do not pile snow against the fence. Watch for rodents or pests looking for shelter.
Note: Wet and humid climates need more frequent cleaning to prevent mold and rot. Dry, dusty areas require regular dust removal. Cold regions need extra care to prevent ice damage, while hot, sunny climates call for UV protection.
By following these seasonal routines, you help your fence stay strong and attractive all year long.
Preventive Repairs
Preventive repairs help you avoid costly fence problems and keep your fence strong for years. When you take small steps now, you save time and money later. You also protect your property and keep your fence looking its best.
Start by making regular inspections part of your routine. Walk along your fence at least twice a year. Look for loose fasteners, rust, rot, pest damage, or leaning posts. Early detection lets you fix small issues before they become big problems.
You should also pay close attention to hardware. Replace damaged or rusted nails, screws, and brackets with corrosion-resistant options. Stainless steel or galvanized fasteners last longer and resist weather damage. Tighten any loose hardware right away.
Wooden fences need extra care. Use pressure-treated lumber for repairs or new installations. This type of wood resists decay and weathering. Every two to three years, apply a water-resistant sealant or stain to protect against moisture. If you see warped or split boards, replace them quickly. Install new boards with the grain facing out to reduce warping.
Tip: Treat wooden posts with preservatives like copper naphthenate or borate-based chemicals. This step helps prevent pest infestations and rot.
Metal fences can rust over time. Clean metal surfaces and apply rust converters or rust-inhibiting primers. Finish with exterior metal paint to seal out moisture. Schedule bi-annual inspections to catch early signs of rust or damage.
Proper installation techniques also play a big role in fence health. Set posts at least one-third of their height underground. For cold climates, place posts below the frost line—usually 36 to 48 inches deep—and use concrete footings. This prevents frost heave and keeps posts stable.
Drainage matters, too. Make sure water flows away from your fence. Good drainage prevents soil washout and keeps posts from leaning. Trim back plants and clear debris to avoid moisture buildup and pest attraction.
Here is a quick checklist for preventive repairs:
Inspect your fence twice a year for damage or wear.
Replace rusted or damaged hardware with corrosion-resistant types.
Use pressure-treated wood and apply sealant every 2-3 years.
Clean fences with gentle, material-appropriate cleaners.
Keep vegetation trimmed and debris away from the fence line.
Set posts deep enough and use concrete footings for stability.
Treat wood with preservatives to prevent pests and rot.
Paint or seal metal fences to stop rust.
Avoid harsh chemicals and pressure washers that can harm fence materials.
Note: If you spot signs of pest infestation or major structural issues, consider calling a professional for help.
By following these preventive repair steps, you extend the life of your fence and avoid bigger repairs down the road. Regular care keeps your fence safe, sturdy, and attractive year after year.
Choosing the right fence repair tools helps you work safely and fix your fence the right way. Start with basic tools and build your skills as you go. Regular maintenance with the correct equipment keeps your fence strong and prevents bigger problems. You can master fence repair with practice and the right guidance. Every project gives you more confidence and better results.
FAQ
What are the most important tools for basic fence repair?
You need a hammer, screwdriver, pliers, tape measure, and level. These tools help you handle most simple repairs on wood, vinyl, or wire fences. Add gloves and safety glasses for protection.
Can I repair a fence without power tools?
Yes, you can fix many fence problems with hand tools. Use a manual saw, screwdriver, and post hole digger for most tasks. Power tools save time, but hand tools work well for small jobs.
How do I know when to replace a fence post instead of repairing it?
Check for rot, cracks, or severe leaning. If a post feels soft or breaks easily, you should replace it. Solid posts can often be straightened and reinforced.
What safety gear should I always wear during fence repair?
Always wear gloves and safety glasses. Use hearing protection when using power tools. Choose sturdy shoes for stability. Safety gear prevents injuries from sharp edges, flying debris, and loud noises.
How do I keep my fence repair tools in good condition?
Clean your tools after each use. Dry them to prevent rust. Store them in a dry place. Oil moving parts like pliers and hinges. Regular care keeps your tools working well.
What is the best way to fix a sagging gate?
Check the hinges and posts first. Tighten or replace loose hardware. Add a diagonal brace or use a turnbuckle kit to support the gate. Make sure the gate swings freely and sits level.
Can I use the same tools for wood, vinyl, and wire fences?
Many tools work for all fence types, such as hammers, screwdrivers, and tape measures. For wire fences, add wire cutters and fence pliers. For vinyl, use a drill and special repair kits.
How often should I inspect my fence for repairs?
Inspect your fence at least twice a year. Look for loose boards, rust, rot, or leaning posts. Early detection helps you fix small problems before they become bigger issues.
Tip: Keep a checklist for your inspections. This habit helps you stay organized and catch problems early.