Mounting an industrial electrical cabinet is far more complex than simply hanging a metal box on a wall. The process demands precision engineering and unyielding structural integrity. Strict adherence to international safety codes is non-negotiable. An improperly secured electrical enclosure poses severe risks. These range from immediate equipment failure to catastrophic structural collapse or life-threatening electrical hazards. An enclosure might look perfectly aligned to the naked eye. However, without the right wall attachments and internal securement mechanisms, it remains a ticking time bomb.
This is exactly where high-quality assembly implements come into play. Professional-grade equipment ensures precise torque application and secure structural mounting. It also guarantees safe internal component assembly. Whether you are dealing with a massive industrial control panel or a compact commercial distribution board, the long-term safety of the installation relies entirely on the hardware. It depends heavily on the specific instruments used to secure it. This comprehensive guide explores the essential equipment required and modern industry trends. We will also dive into step-by-step best practices and the critical mistakes you must avoid on the job site.
Key Takeaways
Safety Beyond Aesthetics: A perfectly leveled distribution board is only safe if secured with the correct load-bearing hardware. Visual alignment never equals structural safety.
The Right Tool for the Job: Utilizing professional fastening hand tools prevents stripped screw heads and damaged delicate components. It stops loose connections that frequently lead to electrical fires.
Internal vs. External Needs: Hoisting and mounting the heavy outer shell requires robust ratcheting systems. Meanwhile, delicate internal wiring demands insulated precision instruments.
Efficiency and Compliance: Using professional-grade kits makes the workflow highly efficient. It ensures strict compliance with stringent safety regulations regarding grounding continuity.
Why Quality Fastening Tools Are Critical for Electrical Cabinets
Ensuring Structural Integrity and Load-Bearing Capacity
The sheer weight of a populated control panel can be incredibly deceptive. Once fully loaded with heavy circuit breakers, programmable logic controllers, step-down transformers, and dense bundles of copper wiring, a standard steel enclosure easily weighs hundreds of pounds. Heavy-duty tightening instruments are absolutely critical here. They ensure that wall anchors, lag bolts, and concrete drop-ins are driven deep enough to handle massive static and dynamic loads. Dynamic forces require fasteners to be torqued to specific tolerances. Think of the physical jolt of operating a heavy disconnect switch or environmental vibrations from a nearby manufacturing stamping press. Only professional-grade gear can achieve this level of precise tension.
Electrical Safety and Grounding
Mechanical securement is directly tethered to electrical safety. Within any chassis, metal components must be properly bonded to guarantee a continuous unbroken ground path. Loose fasteners are often the result of inadequate manual tightening. They create high electrical resistance at the connection point. This resistance generates significant heat. Left unchecked, it can ultimately trigger arc flashes, short circuits, or devastating terminal fires. Precise torque application guarantees that ground lugs and copper busbars maintain reliable electrical contacts without deforming the conductive materials.
The Myth of Visual Alignment
A pervasive and dangerous myth in the construction industry is that a visually straight and plumb cabinet is a safe one. You can easily have an enclosure that looks perfectly aligned on the surface while being dangerously suspended by inadequate drywall anchors. Under-torqued bolts are another hidden threat. Without the immense mechanical tension applied by proper mounting gear, the wall attachment is highly susceptible to creeping failure over time. Thermal expansion, building settling, and the daily mechanical stress of opening heavy steel doors will eventually loosen weak connections. True safety lies in the empirical mechanical grip of the fasteners, not just a bubble in a torpedo level.
Industry Trends: The Evolution of Cabinet Installation Standards
The electrical installation sector is currently undergoing a massive shift. This evolution is driven by stricter regulatory compliance and rapid technological advancements. Historically, installers relied on physical feel to determine if a bolt was tight enough. Today, organizations like OSHA and the IEC are pushing heavily toward verifiable and documented torque auditing. We are seeing a rapid industry-wide adoption of digital tension measurement devices. Modern smart screwdrivers now log exact tension data via Bluetooth for compliance reporting.
Consequently, manufacturers are designing enclosures with highly specific tension tolerances. This prevents the crushing of advanced miniaturized internal electronics. Ergonomics has also taken center stage. With the rising awareness of repetitive strain injuries among electricians, tool manufacturers are prioritizing dual-material anti-fatigue grips. These modern designs maintain high torque transfer while actively protecting the user's joints during long panel-building sessions.
The Ultimate Toolkit: Essential Fastening Tools for Cabinet Installation
Heavy-Duty Socket and Wrench Systems
The initial mounting phase is brute-force work. It requires driving heavy lag bolts into wooden studs or expanding sleeve anchors into solid concrete walls. This phase demands robust socket and wrench tools capable of delivering massive torque without slipping or shattering. Ratcheting mechanisms are your best friend during this stage. Picture yourself wedged between a concrete pillar and a half-mounted 400-pound enclosure. A full swing of a standard wrench is mathematically impossible in that tight clearance. A high-tooth-count ratchet allows for secure incremental tightening even in the most confined environments.
The Versatile Screwdriver and Wrench Set
Once the main chassis is bolted to the wall, the focus shifts to panel assembly and hardware integration. Electrical cabinets utilize a dizzying array of fastener types. You will inevitably encounter tiny Phillips and Slotted screws on terminal blocks. Torx screws secure specialized variable frequency drive housings. Hex bolts lock down heavy ground bars. Having a comprehensive heavy-duty screwdriver and wrench set ensures you have the exact drive geometry needed. This prevents cam-out and stops you from stripping delicate screw heads.
Precision Fastening Hand Tools for Internal Wiring
Internal assembly involves attaching DIN rails, mounting galvanized backplates, and securing fragile terminal blocks. This requires precision instruments that offer excellent tactile feedback to prevent over-tightening. Crucially, when working inside enclosures, the use of VDE-certified insulated equipment is a non-negotiable safety requirement. This is especially true during maintenance or retrofit installations where secondary circuits might still be live. These tools provide a life-saving barrier against high-voltage electric shocks up to 1000V.
Core Comparison: Standard vs. Professional Installation Gear
Feature
Standard Hardware Store Tools
Professional-Grade Fastening Kits
Material Strength
Carbon steel, prone to bending under high torque.
Chrome Vanadium or Chrome Molybdenum, high tensile strength.
Ratchet Mechanism
Low tooth count, requires wide swing arcs.
72-tooth or higher, perfect for tight cabinet corners.
Electrical Safety
Bare metal, high risk of arc flash and shock.
VDE-certified insulation rated up to 1000V.
Storage & Organization
Loose bags, high risk of losing critical bits.
Blow-molded hard cases for rapid inventory checks.
Ergonomics
Hard plastic, causes blistering over long shifts.
Dual-material rubberized grips for anti-fatigue.
Step-by-Step: How Fastening Tools Support the Installation Process
Phase 1: Wall Preparation and Layout
The physical work begins long before the cabinet is hoisted into the air. Installers must mark precise drill points using leveling instruments and tape measures. Depending on the substrate, specific anchors must be selected. Concrete drop-ins are perfect for cinderblock. Heavy toggle bolts are required for reinforced hollow walls. Precision at this stage dictates the success and safety of the entire mounting process.
Phase 2: Mounting the Empty Enclosure
To minimize lifting weight, the cabinet is almost always mounted empty. Using heavy-duty ratchets, the installer bolts the bare steel shell to the wall or floor stand. Professionals utilize a star-pattern tightening sequence. This is similar to tightening lug nuts on a car tire. This method evenly distributes mechanical stress across the metal chassis. It locks the cabinet into a perfectly plumb position without warping the frame. A warped frame will cause the rubber door seals to fail. This instantly compromises the environmental rating of the enclosure.
Phase 3: Installing Internal Hardware and Backplates
After the outer shell is anchored, the installer transitions to smaller hand instruments. The heavy galvanized backplate acts as the mounting canvas for all electrical components. It is bolted securely into the rear of the cabinet. Cable glands, conduit fittings, and cooling fan housings are also secured during this phase. Tactile precision is required to ensure that weather-stripping and rubber gaskets are compressed evenly without being pinched or crushed.
Phase 4: Component Mounting and Wiring
The final structural phase involves mounting contactors, breakers, and copper busbars onto the DIN rails. Torque control is paramount here. The delicate plastic housings on modern electrical components can easily crack or shatter if over-tightened. Conversely, under-tightened wire terminals will inevitably cause electrical arcing and systemic failure.
Common Installation Mistakes and How to Avoid Them
Over-Tightening and Stripping Threads
Applying excessive force is a remarkably frequent error. This happens particularly among inexperienced technicians who rely on power impacts instead of manual instruments for delicate tasks. Using the wrong size bit or over-torquing a wrench can permanently damage the threaded inserts welded to the cabinet body. If a threaded insert is ruined, the cabinet door may not close tightly. This renders the enclosure unsealable and completely vulnerable to dust and water ingress.
Ignoring Torque Specifications
Every major electrical component comes with manufacturer-specified torque limits for a reason. Ignoring these specifications is a critical fire hazard. Under-tightening leads to micro-arcing and thermal runaway. Over-tightening can sheer off the fastener entirely or crack the internal conductive elements of a breaker. Utilizing calibrated torque instruments rather than relying on physical feel is the only objective way to ensure safety compliance.
Using Non-Insulated Tools on Live or Residual Current
A lethal mistake made by both beginners and seasoned veterans is using standard bare-metal tools inside a potentially live cabinet. Even if the main disconnect switch is thrown, residual electrical charge stored in large capacitors can deliver a fatal shock. Mislabeled secondary circuits pose the exact same threat. Always transition to insulated gear when working anywhere near internal wiring.
How to Choose the Right Equipment for the Job
Material and Durability Standards
Industrial construction environments are unforgiving. When selecting your gear, look for items forged from Chrome Vanadium or Chrome Molybdenum steel. These specific alloys offer maximum lifespan and superior resistance to chemical corrosion. They possess the immense tensile strength required to handle high-torque applications without bending or snapping under pressure.
Ergonomics and Grip Optimization
Wiring an industrial control panel is highly tedious. It often requires hundreds of screws to be manually driven in a single afternoon. The ergonomics of your handles play a major role in both efficiency and physical health. Prioritize handles with dual-material anti-slip rubberized grips. This reduces hand fatigue and prevents blistering. It ensures you maintain a firm hold even if your hands are covered in sweat or wire pulling lubricant.
Comprehensive Kits vs. Individual Pieces
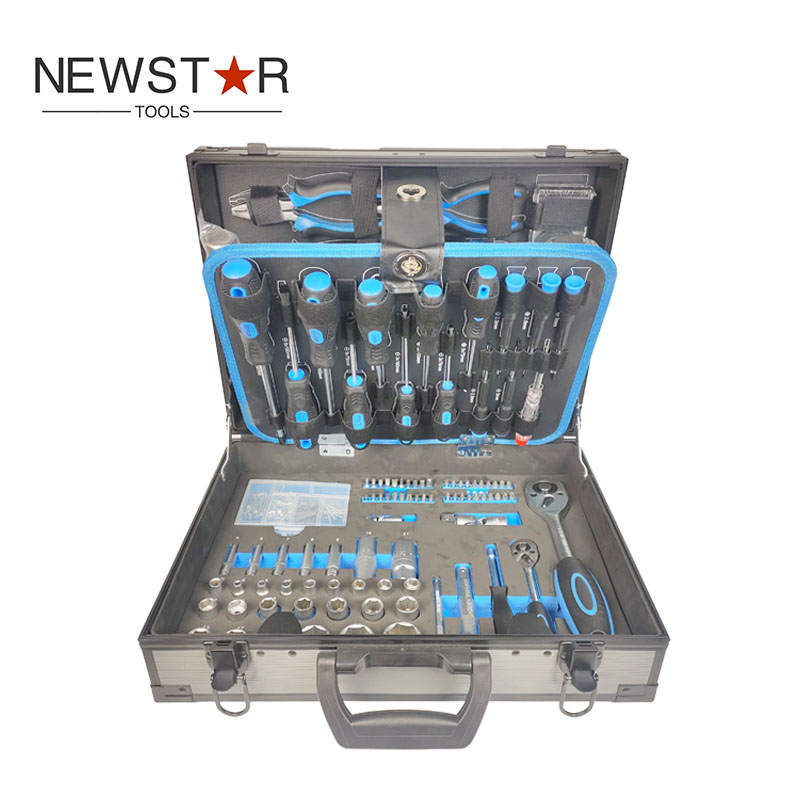
Buying individual pieces as needed might seem cheaper initially. However, investing in an organized heavy-duty kit is vastly more practical for professionals. Comprehensive kits ensure you have every metric and SAE socket size immediately at hand. Organized blow-molded hard cases prevent tools from being lost on chaotic job sites. They protect the equipment from ambient moisture and significantly speed up the workflow by keeping everything categorized and accessible.
Maintenance and Upkeep of Your Fastening Tools
Cleaning and Lubrication Protocols
After a grueling installation, your equipment is likely covered in drywall dust, concrete powder, industrial grease, and microscopic metal shavings. It is vital to wipe down all metal shafts with a clean rag and a mild solvent. Additionally, applying a few drops of light machine oil to the internal gears of your ratchets will maintain smooth operation. This simple habit prevents mechanical jamming on the next job.
Proper Storage Techniques
Proper storage directly extends the life and accuracy of your equipment. Keep items securely in their designated hard cases rather than throwing them loosely into a canvas bag where they can chip against each other. For tension-measuring devices, proper storage means dialing the spring tension back to its lowest setting before casing it. Leaving it under pressure will cause it to lose its calibration accuracy over time.
Inspecting for Wear and Tear
Routinely inspect your gear for degradation. A driver with a worn rounded tip should be discarded immediately. It will inevitably cam-out and destroy expensive screw heads. For electrical hand instruments, inspect the rubber insulation meticulously. Any cuts, deep abrasions, or cracks in the handle completely compromise the safety certification and put you at immediate risk of electrocution.
Conclusion
Electrical cabinet installation is a high-stakes task with zero margin for error. It relies heavily on the quality, precision, and appropriate application of professional mounting equipment. From the heavy-duty ratchets that anchor the massive steel box to the concrete wall, to the delicate insulated drivers that secure the intricate internal wiring, the right toolkit remains an installer's greatest asset. By auditing your current equipment, upgrading to professional-grade sets, and adhering to strict maintenance protocols, you ensure that every installation is structurally sound, highly efficient, and flawlessly safe. To equip your team with the highest standard of reliable gear, explore the comprehensive professional toolkits available at Newstar Hardware and elevate your installation quality today.
FAQ
Do I really need insulated fastening hand tools if the power is turned off during installation?
Yes. While the main power should always be locked and tagged out during installation, insulated instruments provide a critical secondary layer of protection. They guard against accidental power-ups, residual capacitor charges, or undocumented circuits that might still be energized.
What is the best type of wall anchor to use with socket and wrench tools for a heavy electrical cabinet?
It depends entirely on the substrate. For solid poured concrete, wedge anchors or heavy-duty sleeve anchors are superior. For wooden studs, heavy-gauge lag bolts are required. Always cross-reference the sheer and pull-out load rating of the anchor against the total loaded weight of the populated cabinet.
Can I use a standard power drill instead of manual instruments for the internal wiring?
While an impact driver can certainly speed up the external wall mounting phase, manual instruments are highly recommended for internal components. Power tools lack tactile feedback and can easily over-torque. This can shatter delicate plastic electrical housings or strip fine machine screws in a fraction of a second.
Why is my electrical cabinet wobbling even though the screws look tight?
This frequently happens if the wall itself is uneven or if the incorrect fasteners were used. An enclosure can look perfectly aligned but still lack structural rigidity. You may need to use metal shims behind the chassis. Ensure you are using the correct equipment to drive the bolts fully into the load-bearing structural supports, not just the hollow drywall.
What should a beginner look for in a starter tool kit?
A beginner should seek out a comprehensive kit housed in an organized durable hard case. It should include both metric and SAE sockets, a multi-bit or varied screwdriver set, hex keys, and a reliable high-tooth-count ratcheting mechanism. Focus on material durability like Chrome Vanadium steel and comfortable ergonomic grips to ensure longevity and ease of use.
How do I verify the torque applied to internal busbars?
Verification requires a calibrated torque wrench or a digital torque screwdriver. You must set the tool to the exact inch-pound or Newton-meter specification provided by the component manufacturer. Once the fastener reaches the set tension, the tool will click or provide a digital alert, ensuring you do not over-tighten the copper connections.
What is the recommended maintenance schedule for industrial fastening kits?
Professional kits should be wiped down daily to remove corrosive dust and moisture. Moving parts, such as ratchet heads, should be lightly oiled once a month. Insulation on electrical tools should be visually inspected before every single use to ensure there are no micro-tears exposing the conductive metal shaft.